Creating Experiments, Biosamples, and Replicates
If you have created a Dataset then you are ready to describe the experiments and biosamples for your dataset.
Experiments (also known as assays) represent an experiment at a fine-grained unit of detail. It is intended to broadly cover multiple “bioinformatics” (i.e., sequencing or array) and imaging (i.e., various forms of microscopy) assay types. An experiment will generally be conducted on multiple biological replicates. An experiment may reference another experiment as its “control.”
Replicate records in the database represent the association between an Experiment and a Biosample. To keep things simple for data entry and display, the Replicate has simple numeric columns to record the “Biological Replicate Number” and “Technical Replicate Number.”
Note: You should complete the following steps before uploading files, even if you are planning to upload using the bulk upload (desktop or command-line) client tools.
All of the instructions that follow assume you are logged in to the FaceBase site.
The main steps are:
- Create biosamples to describe the biological samples for the study.
- Create experiments to describe the experimental details of the study.
- Create replicates to associate experiments with biosamples.
If you are entering enhancer data or clinical/human subjects metadata, you may skip directly to the following section:
What are Local Identifiers?
You will notice that the biosample and the experiment forms have fields for entering a Local Identifier. Local identifiers provides a way to reference your own laboratory’s local identification schema for your experiments and biosamples (mouse, zebrafish, etc.). This can be useful for correlating FaceBase data entries with your own records. For example, if a user of your data has a question, you may be able to use these local identifiers as a means of looking up items from your own records. This is an optional field.
1. Create biosamples
Enter metadata regarding the biosamples in your dataset. FaceBase does not collect tissue or other physical samples. The ‘biosamples’ here are metadata to describe the physical samples you used in your experiments only.
- Go to your Dataset record page.
- Do not use the edit mode of the page; remain on the display page.
- Scroll down the page to find the Biosample section.
- If you do not see the Biosample section, click the Show All Related Records link near the top right of the page.
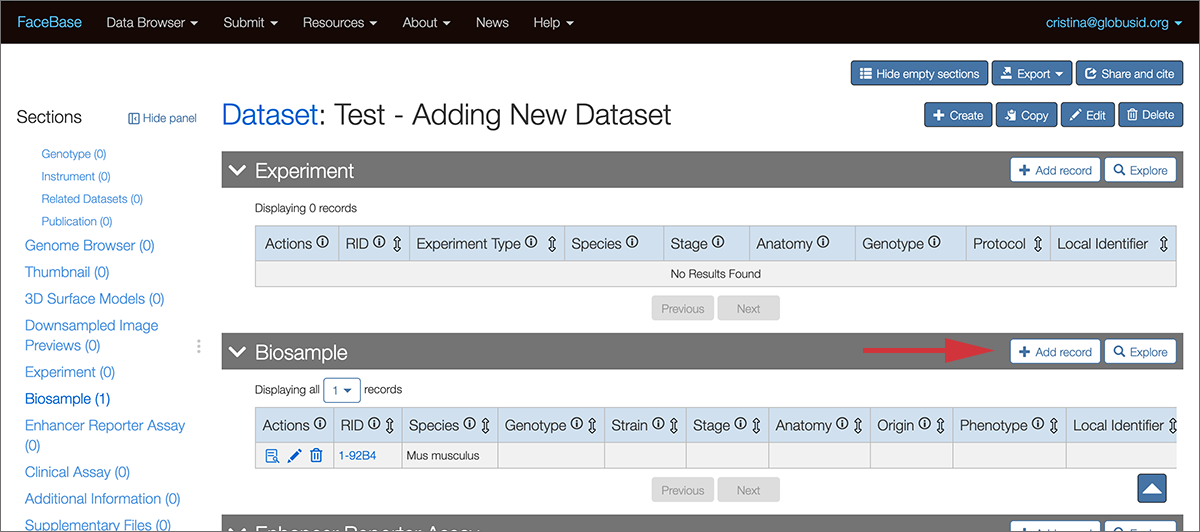
- To the right of the Biosample heading, click the Add Record button. This will open a new browser tab with the data entry form.
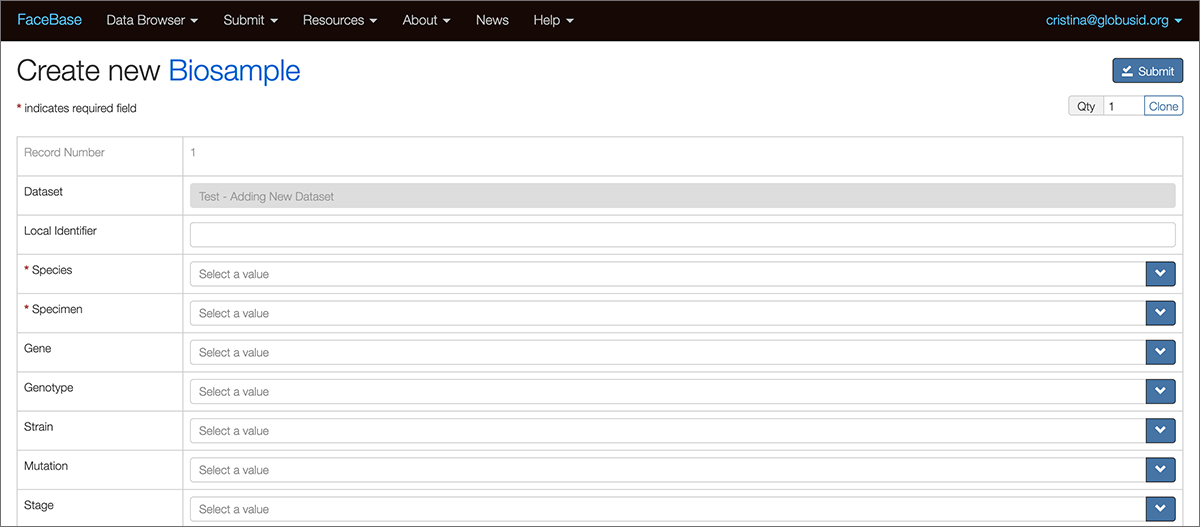
- Fill in the form as completely as possible for the fields relevant to your data.
- When you are done, click the Submit button in the upper right corner.
- Review the confirmation page that displays the entered data.
- When you are done viewing the confirmation page, close the browser tab and return to the Dataset page. You should now see the newly entered Biosample. You may need to refresh your browser page.
Entering multiple records (multi-edit)
You can choose to enter multiple records at a time. From a record page, click the Copy button near the upper right side of the page. A new form appears with the same values as the record you copied.
Click the Clone button in the upper right corner to expand a new data entry form each time you click.
You can also enter the number of copies in the number field before clicking Clone to create that number of new data entry forms. You can expand the form with up to 200 records at a time.
Note that when you click Clone, the new data entry form will include any values from the right-most existing form. You can use this to streamline data entry by filling in some fields that are shared by multiple entries, pressing the Clone button multiple times, then filling in the unique field values for each record on the page.
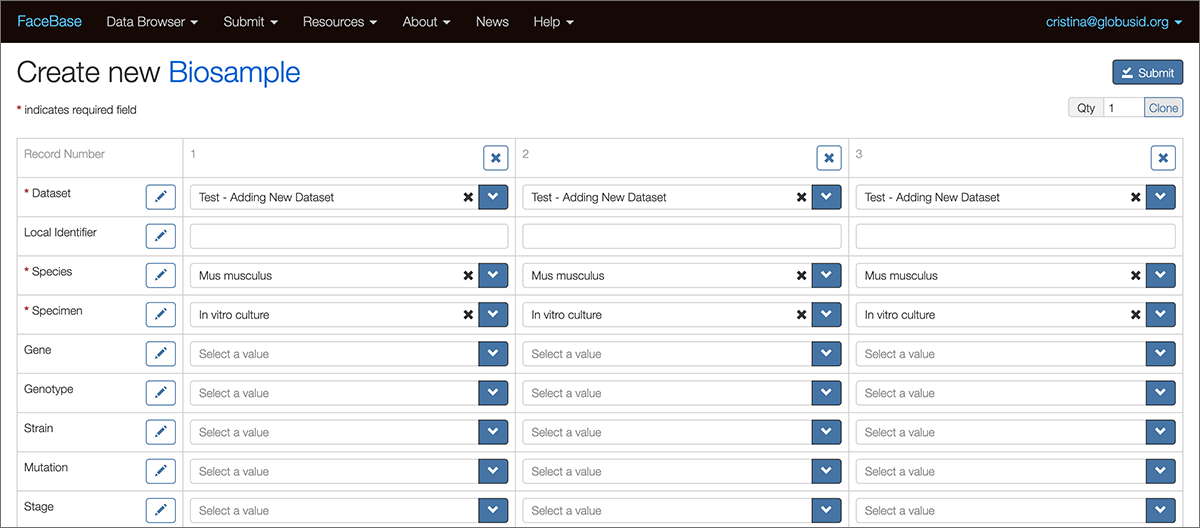
No matter how many entries you add, the form will not be saved to the system until you click the Submit button. Note that the entire form with all records will succeed or fail to be submitted as one unit. There are no partial successes when submitting multiple records.
2. Create experiments
Create an experiment record if you are entering RNA-seq, ChIP-seq, array, imaging (micro-CT), or microscopy (confocal) experiments. Because the form covers a wide range of experiment types, in many cases you will only fill in a small (sometimes only 1-2) number of fields.
- Go to the Dataset record
- Scroll down the page to find the Experiment section.
- If you do not see the Experiment section, click the ‘Show All Related Records’ link near the top right of the page.
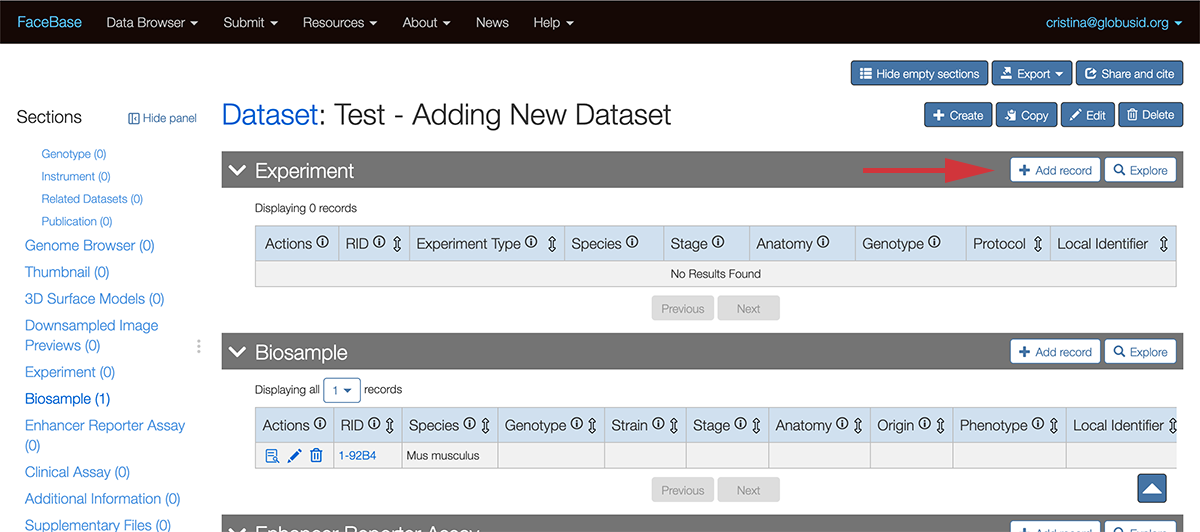
- To the right of the heading, click the Add Record button. This will open a new browser tab with the data entry form.
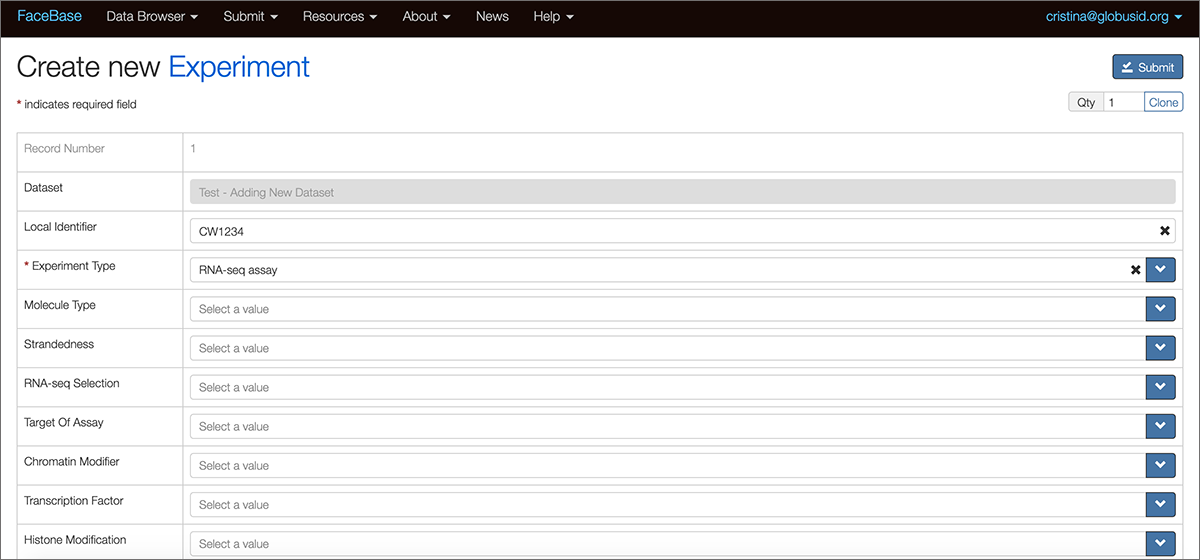
-
Fill in the form as completely as possible for the fields relevant to your data. The example above shows a hypothetical RNA-seq experiment. Note that many fields are left blank because they are not relevant to this experiment type.
-
To link your Experiment to a protocol, click the Protocol field to display the “Select Protocol” modal window.
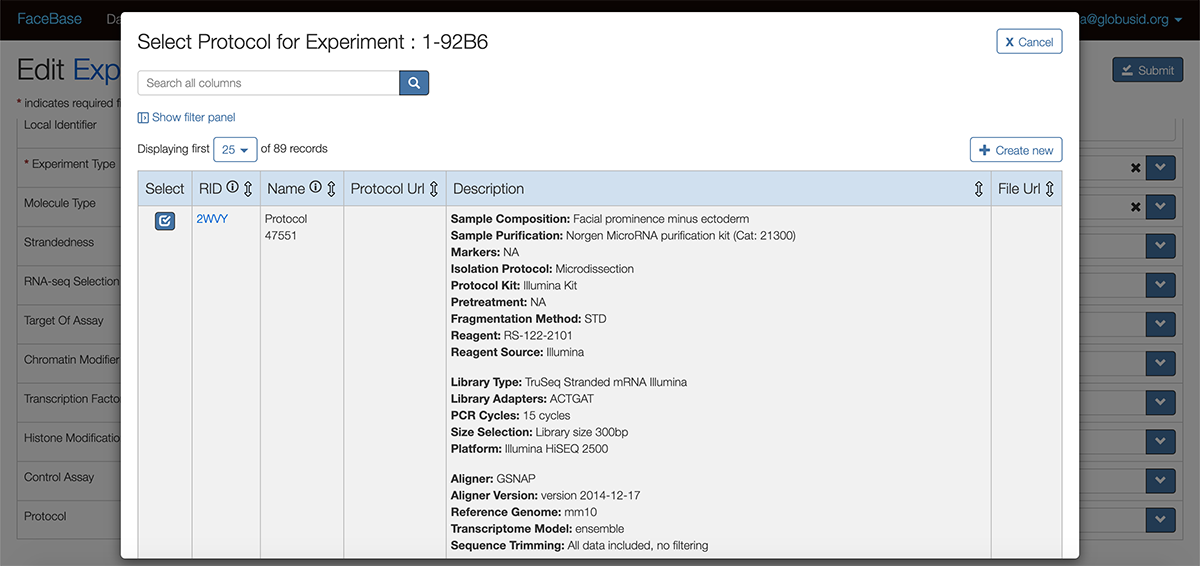
From here you can:
- Search for a protocol that is already in the system and select it.
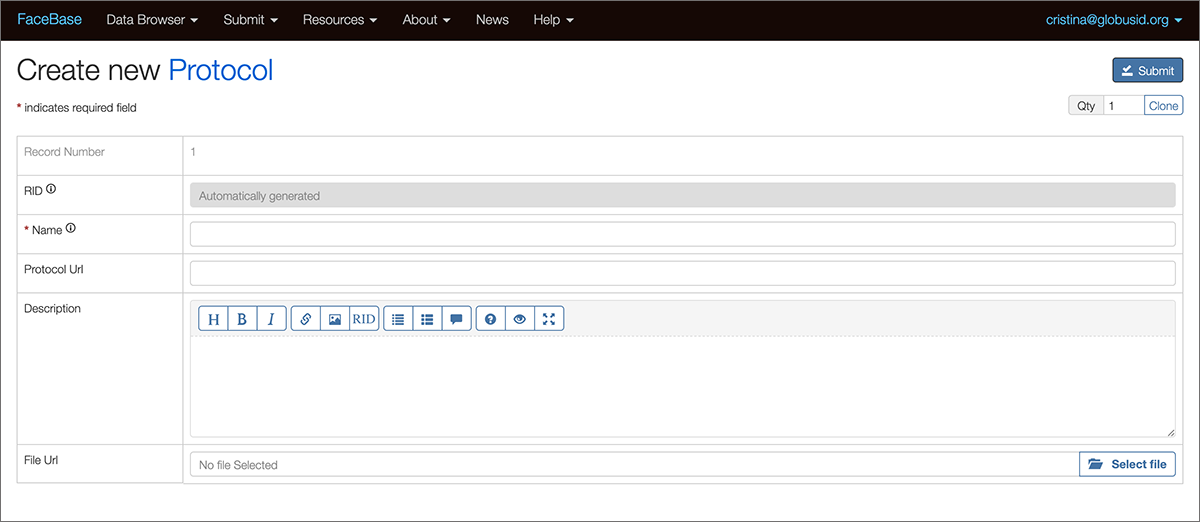
- Click the Create New button to add a protocol to the system and then select it. This will open a new browser tab. Your choices for adding a new protocol are:
- Fill in the fields with the protocol information for online display.
- Enter a link to an existing online source in the “Protocol Uri” field.
- Upload a file (PDF, Word doc, etc) by clicking “Select File” at the “File Url” field.
- When you are done, click the Submit button and you will see the information you entered. You can then close this browser tab and go back to the “Select Protocol” modal window to select the Protocol record you just entered.
- When you are finished entering the Experiment information, click on the Submit button and you will see the newly entered Experiment information.
3. Create Replicates and associate with Biosamples
For each Experiment record, you must now use Replicate records to associate it with the Biosample records you’ve already created.
- Go to the Experiment record (where you left off from the previous step).
- Scroll down the page to find the Replicate section.
- If you do not see the Replicate section, click the ‘Show All Related Records’ link near the top right of the page.
- To the right of the Replicate heading, click the Add Record button. This will open a new browser tab with the data entry form.
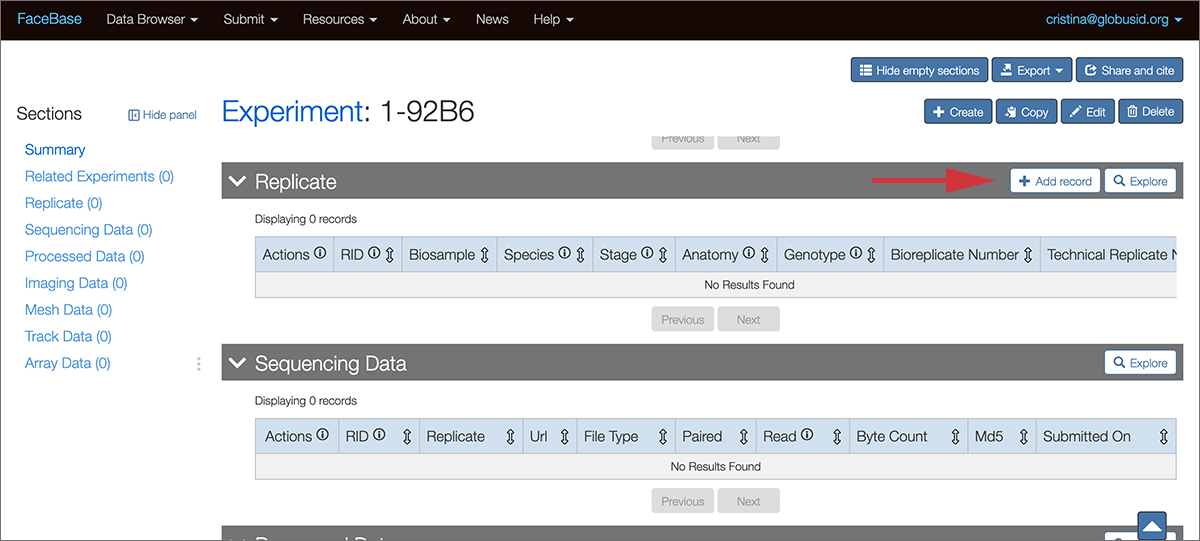
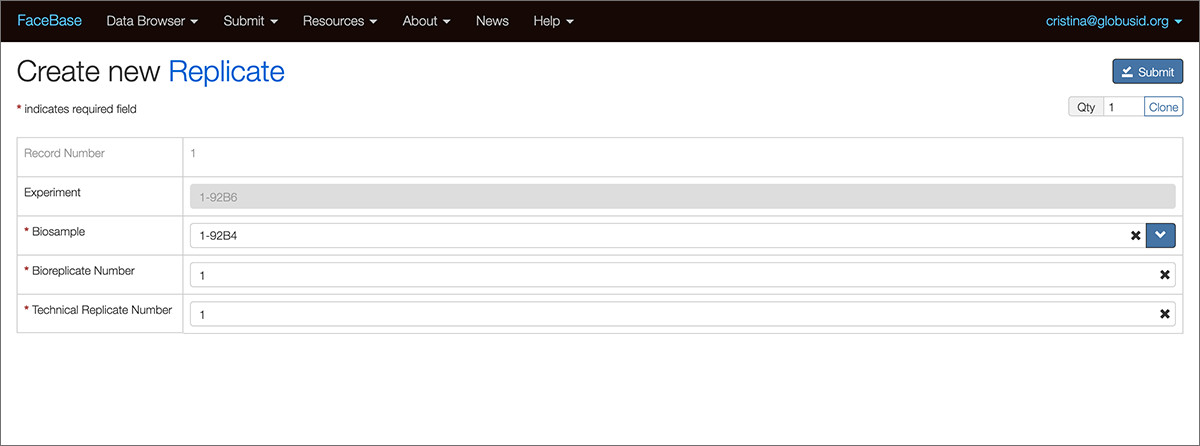
- In the Biosample field, click the dropdown list to open the “Select Biosample for new Replicate” modal window and choose from Biosamples that were already created under the same Dataset. You can also add a new Biosample here by clicking the Create New button.
- The “Bioreplicate Number” and “Technical Replicate Number” fields default to “1”. Make sure this number represents the total number of replicates. Technical replicates are fairly rare in FaceBase and you are likely to leave this as “1” for all entries. However, you must increment the Bioreplicate Number.
- This is a good time to use the multi-entry feature of the form by clicking the Clone button for each number of Replicates you want to add, and then incrementing the Bioreplicate Number per form as appropriate.
- When you are done, click on the Submit button and review the Replicate information you entered.
- When you are done, close the browser tab and return to the Experiment page. You may need to refresh the page to see the new entries.
4. Uploading data files
When you have created your replicate records, you are now ready to upload files. There are two options for uploading files:
- Recommended Use the bulk upload utilities described on the uploading files page of this wiki.
- Go to each Replicate page, add records for each file and upload via the browser. (To find Replicate records, go to the Dataset, select the Experiment and then you’ll see a listing of Replicates for that Experiment).
- Go to the Replicate record and you’ll see sections for various data types such as: sequencing, processed, track, imaging, and/or mesh data files.
- For the data type section related to your data, click the Add Record button. A new browser tab opens with the data entry form.
- In the “Url” field, click the Select file button to select the data file.
- In the “File Type” field, click the field to open the “Select File Type” modal window. Find the appropriate extension under the “Name” column and select it.
- When you are finished, click Submit to upload the file.
5. Creating records for other assay types
To enter clinical assays and enhancer records, you can add them from the Dataset record.
- Go to the Dataset record.
- Scroll down to the “Enhancer Reporter Assay” or “Clinical Assay” section and click the Add record button. A new browser tab opens with the data entry
- Fill in the details as completely as possible and click Submit.
Review your entries
When you have reviewed your biosample, experiment, and/or other metadata, you are ready to upload files.