Creating Biosamples and Experiments
If you have created a Dataset, you are ready to describe the biosamples and experiments in it.
Which path does my data take?
Not all assay types are entered the same way. Find your data in the table below before you start.
| If your dataset contains | How to enter it |
|---|---|
| Clinical assays, or sequencing, array, imaging, or microscopy data — RNA-seq, ChIP-seq, micro-CT, confocal, and similar | Follow the five steps on this page. These assays have data files, and files attach to biosamples, so biosamples come first. |
| Enhancer reporter assays | Create the record directly from the Dataset page. See Enhancer reporter records. No separate biosample or experiment record is needed. |
Key terms
Biosamples represent the biological characteristics of the specimen used within an experiment. Typically, each experiment includes multiple biological samples with essentially the same biological characteristics (e.g., biological replicates).
Note: FaceBase does not collect tissue or other physical samples. The biosamples described here are metadata about the physical samples you used in your experiments.
Experiments (also known as assays) represent an experiment at a fine-grained unit of detail. The record type broadly covers both “bioinformatics” (sequencing or array) and imaging (various forms of microscopy) assay types. An experiment is generally conducted on multiple biological replicates, and may reference another experiment as its control.
Local identifiers let you reference your own laboratory’s identification schema for your experiments and biosamples. Both forms include a “Local Identifier” field. These are useful for correlating FaceBase entries with your own records. For example, if someone using your data has a question, you can look the item up in your own records. They are also key to matching your files to your biosamples.
The five steps
All of the instructions that follow assume you are logged in to the FaceBase site.
- Create biosamples to describe the biological samples in your study.
- Upload files — in batch with the DERIVA client tools, or one at a time through the browser.
- Link files to their biosamples so each file is associated with the sample it came from.
- Create experiments to describe the experimental details, and link each biosample to its experiment.
- Link a protocol to document how the experiment was performed.

Tip: Use the Sections panel on the left to jump straight to a section instead of scrolling. The number beside each name tells you how many records it holds. If a section isn’t listed, click Show empty sections at the top right. The sections don’t appear in the order you’ll work through them, so use the panel rather than working top to bottom.
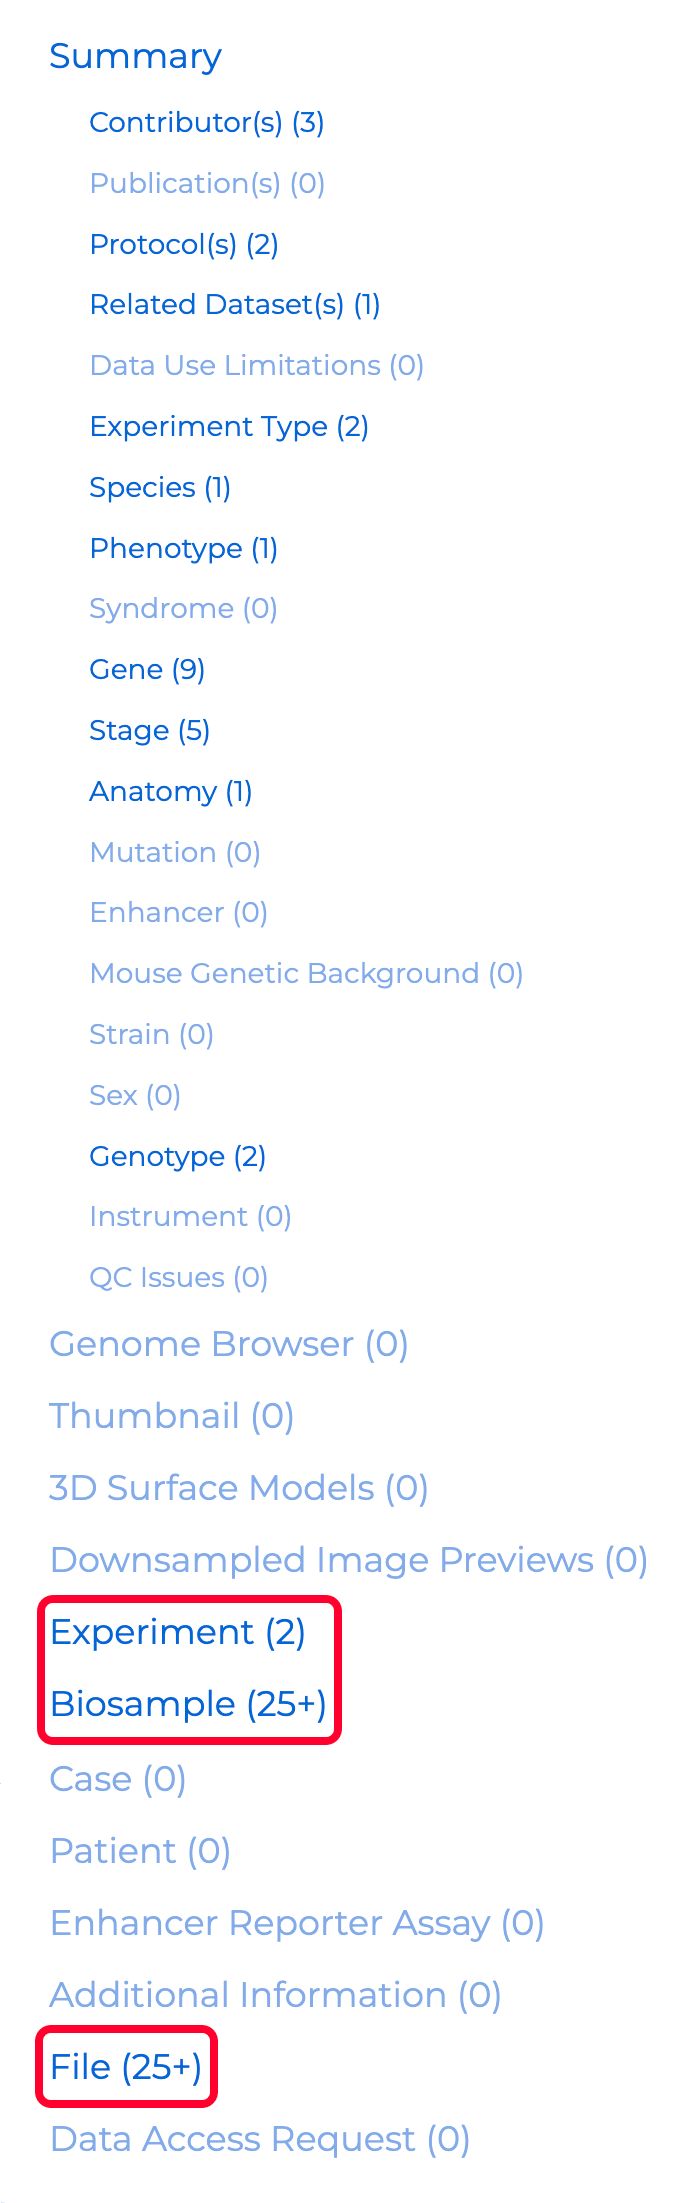
Click the image to see the full Sections panel.
Entering a lot of records? Two tools can save you time: Clone creates several similar records at once, and Bulk edit changes a field across records you’ve already saved.
Step 1. Create biosamples
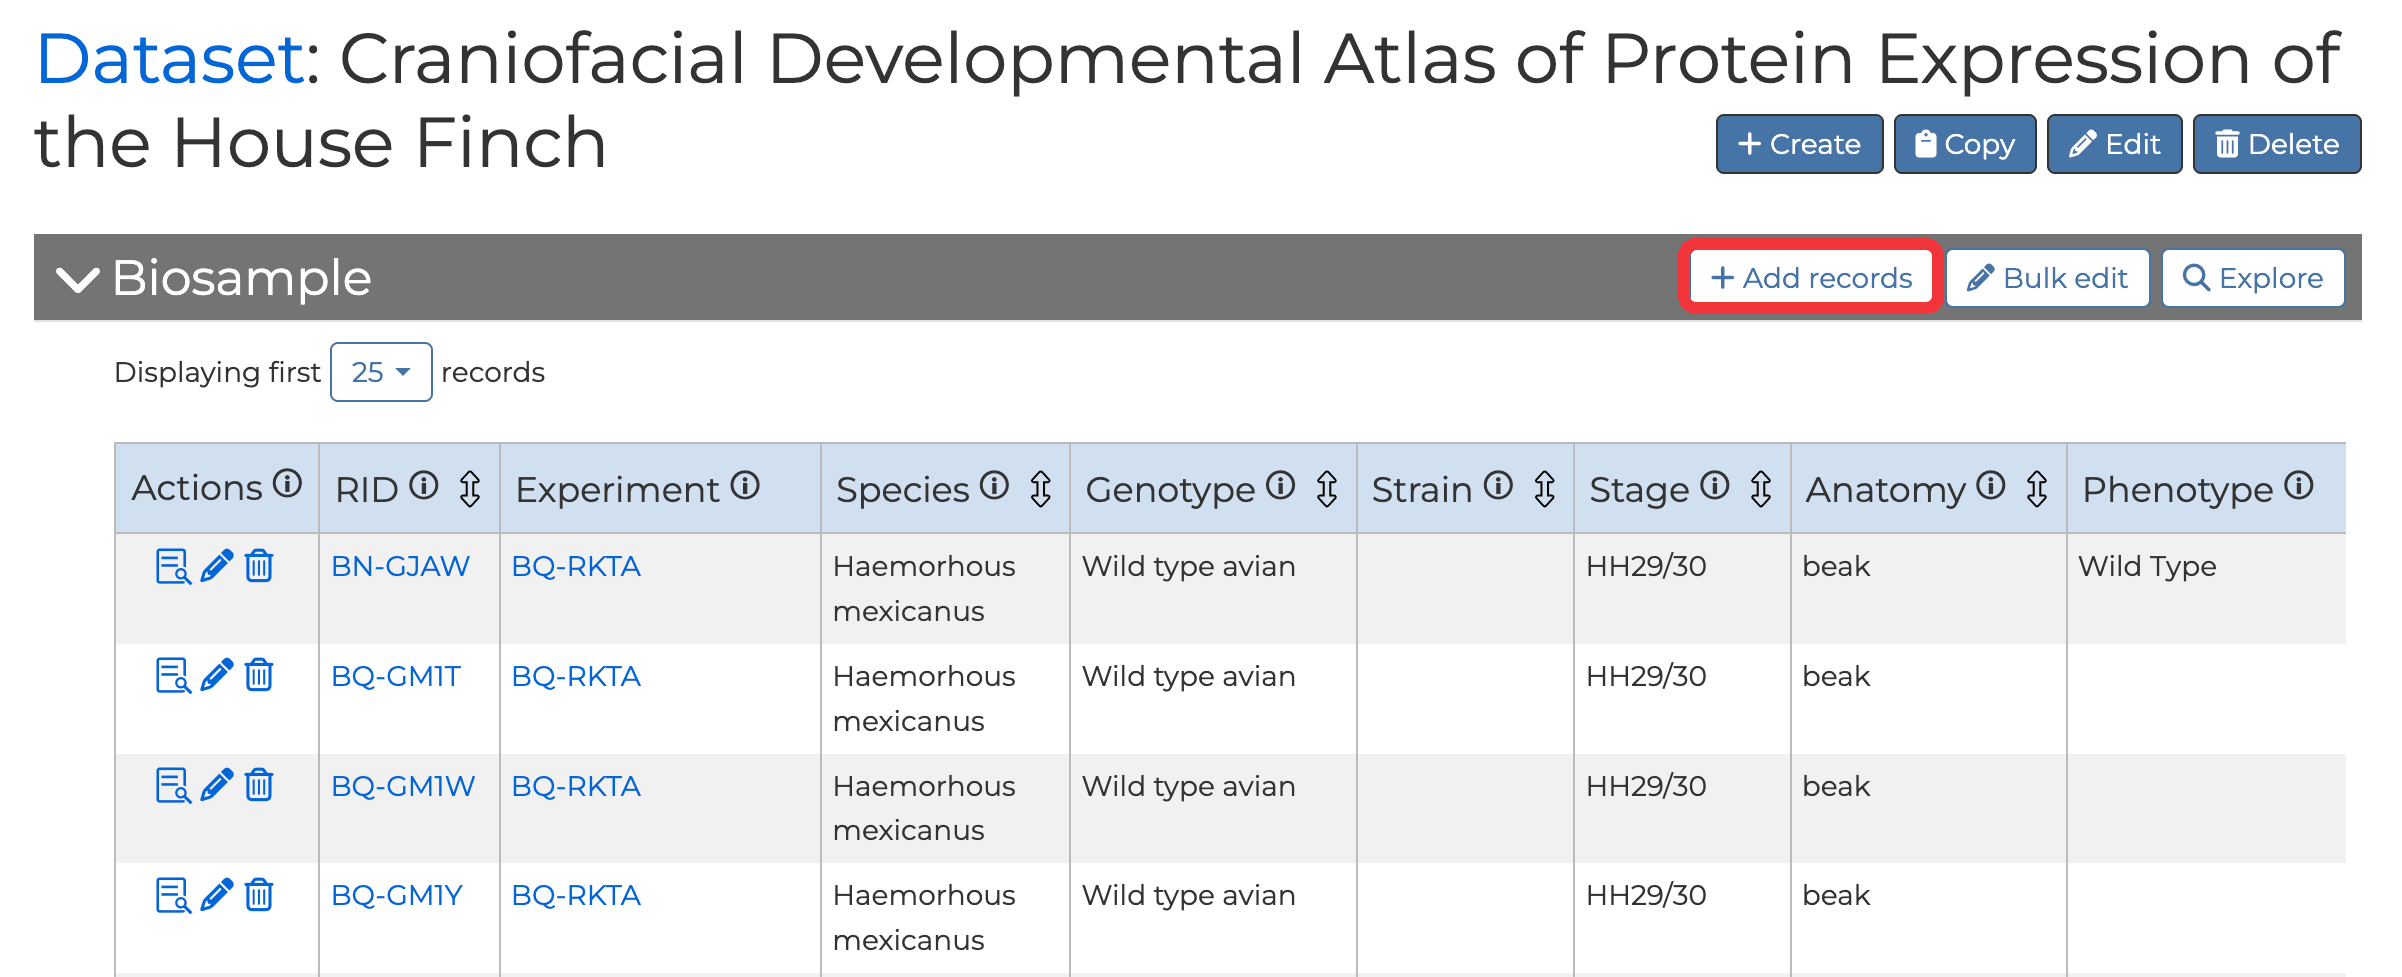
- From the Dataset record, go to the Biosample section.
- If you do not see the Biosample section, click the Show empty sections button near the top right of the page.
-
To the right of the Biosample heading, click the Add records button. A new browser tab opens with the data entry form.
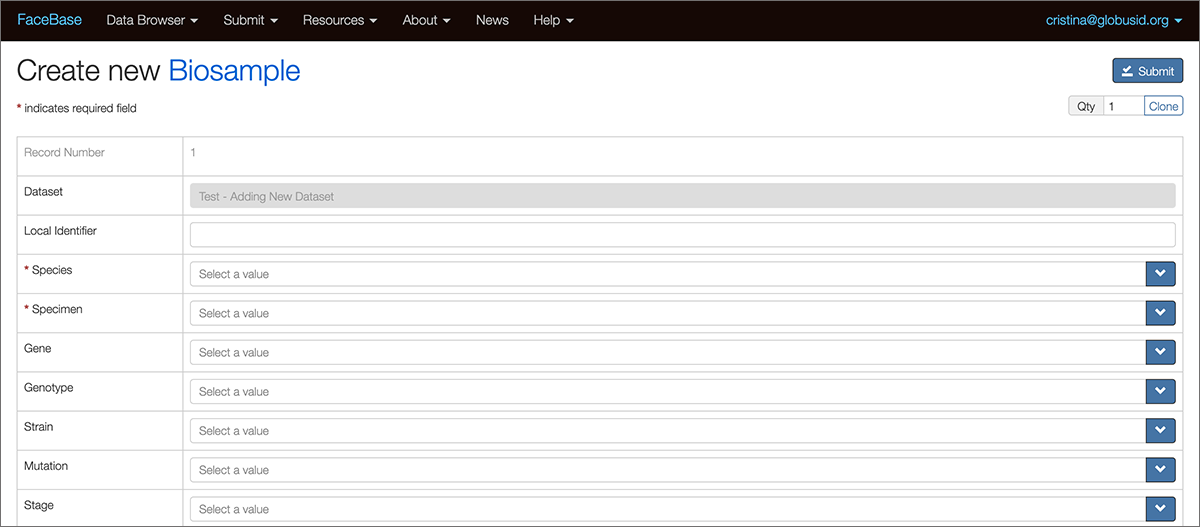
- Fill in the form as completely as possible for the fields relevant to your data. Leave the “Experiment” field blank — you will fill it in at Step 4, after your experiment records exist. Note: The Dataset field is filled in automatically because you started from the Dataset page.
- When you are done, click the Save button in the upper right corner.
- Review the confirmation page that displays the entered data.
- Close the browser tab and return to the Dataset page. You should now see the newly entered biosample. You may need to refresh the page.
To enter several biosamples, see Working with many records.
Step 2. Upload files
Once your biosample records exist, you are ready to upload files. Choose one of the two options below.
Option 1: Batch upload with the DERIVA client tools
Recommended for anything more than a handful of files. See the uploading files page for installation and usage instructions. After the upload finishes, continue to Step 3 to associate the files with their biosamples.
Option 2: Upload through the browser
Best for a small number of files.
- From the Dataset page, go to the Biosample section and click the View Details icon for the biosample you want, then scroll down to the File section.
- Click the Add records button. A new browser tab opens with the data entry form.
- In the “URL” field, click the Select file button and choose your data file.
- Click the “File Format” field to open the “Select File Format” window. Find the appropriate extension under the “Name” column and select it.
- Click Save to upload the file.
Because you started from the biosample record, these files are already associated with it and you can skip Step 3.
Step 3. Link files to their biosamples
Files uploaded with the DERIVA client tools arrive in the dataset unassociated. This step tells FaceBase which biosample each file belongs to.
- Go back to the Dataset page, go down to the File section, and click Explore.
-
Search for the portion of the filename that matches one biosample, often its local identifier, or use the filters in the left sidebar (click Show filter panel if they’re hidden).
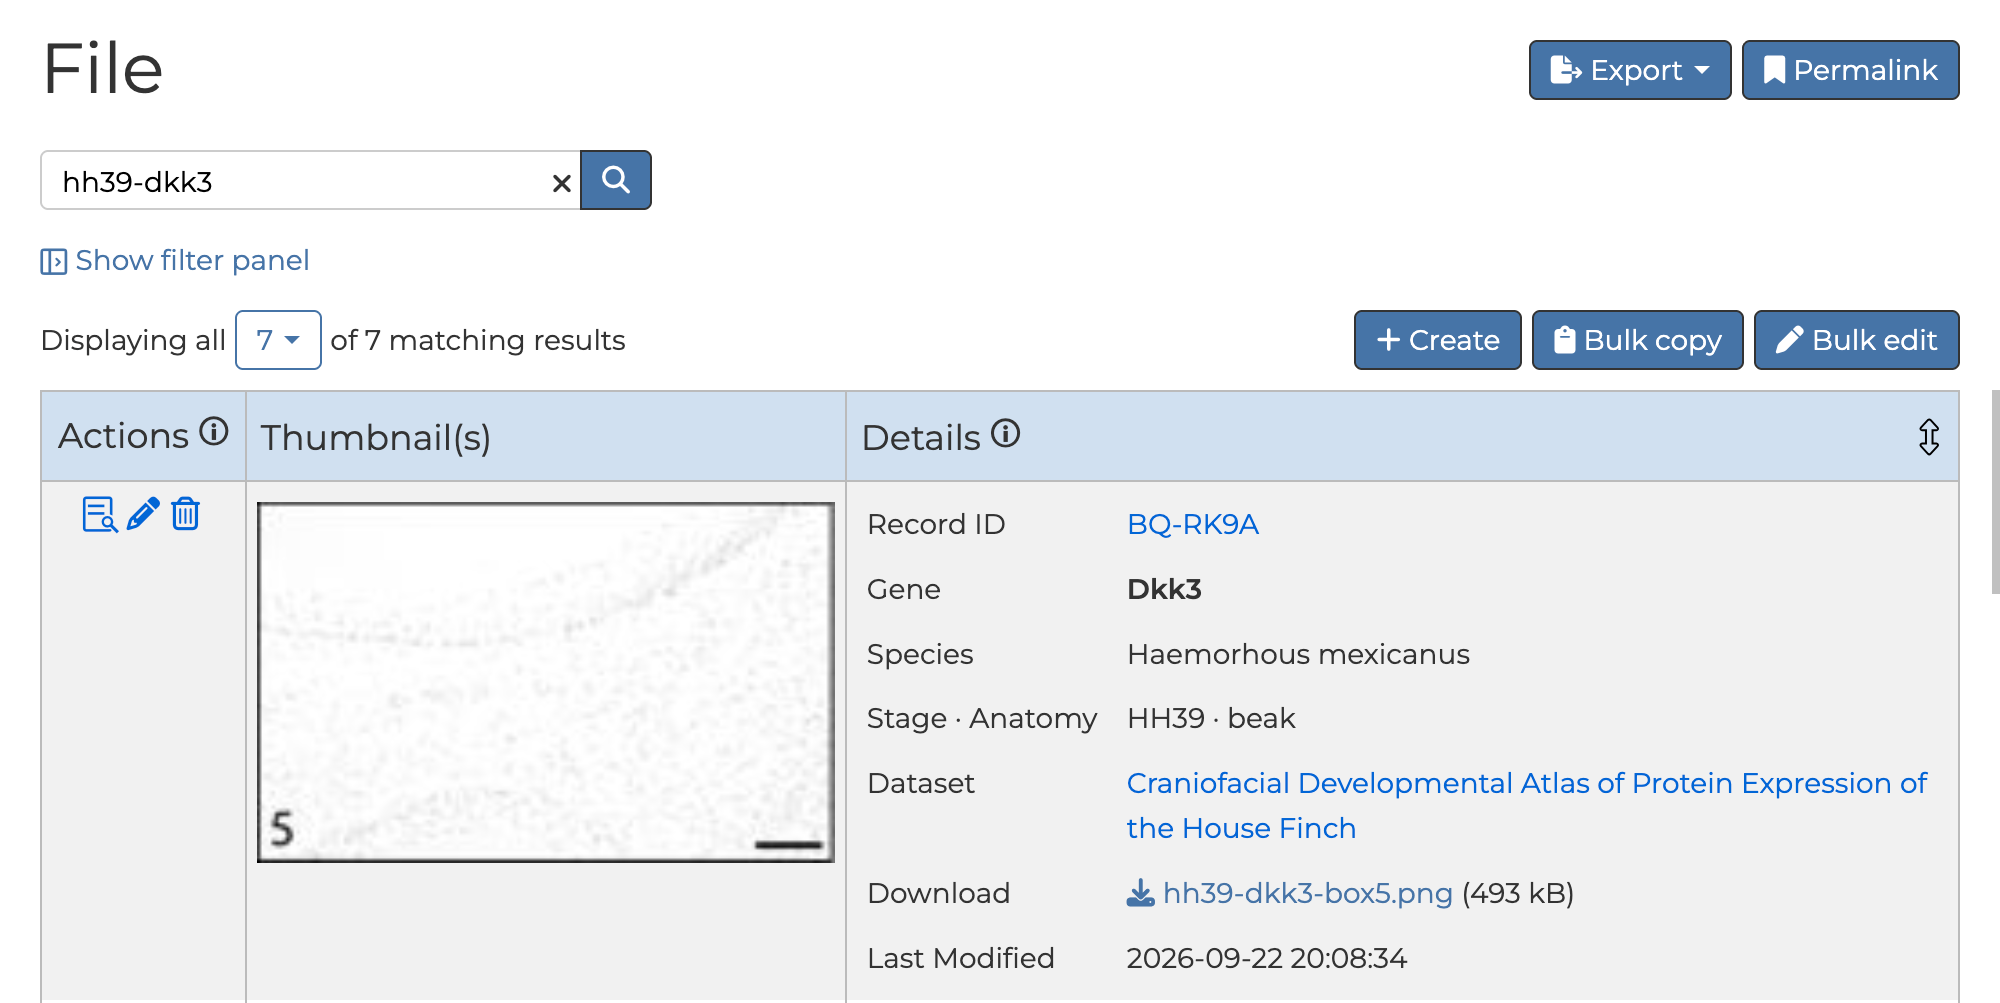
- Use Bulk edit to set the “Biosample” field for all of the listed files.
Repeat for each remaining biosample.
Working with a lot of files? We can do Steps 2 and 3 for you. Send us a spreadsheet mapping your biosamples’ local identifiers to your filenames and we will handle the upload and the associations. Contact us at help@facebase.org.
Step 4. Create experiments
Create an experiment record to describe the experimental details of your study. The form covers a wide range of experiment types, so in many cases you will fill in only a small number of fields.
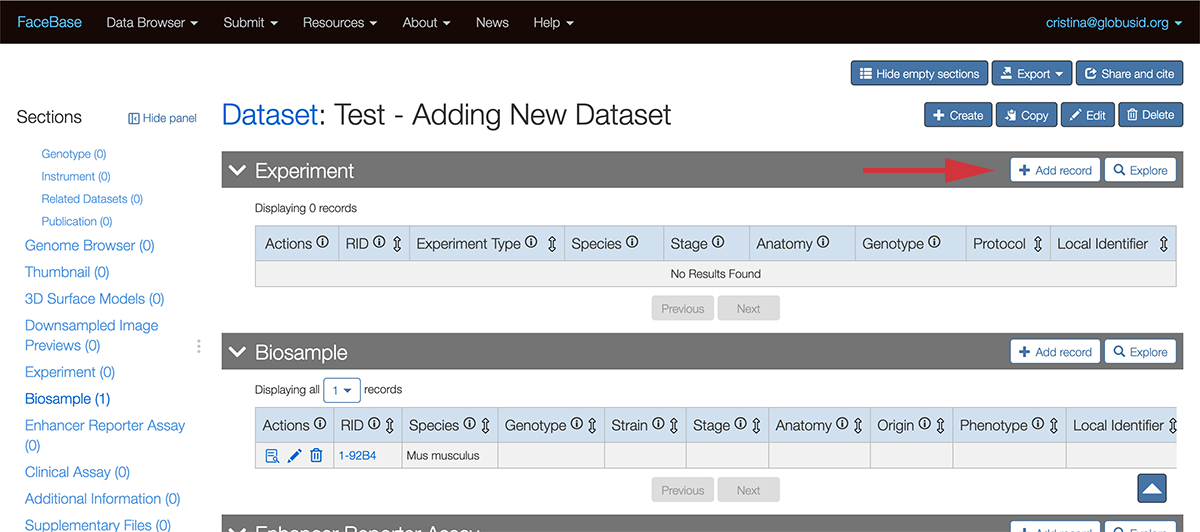
- From the Dataset record, go down to the Experiment section.
- If you do not see the Experiment section, click the Show empty sections button near the top right of the page.
-
To the right of the heading, click the Add records button. A new browser tab opens with the data entry form.
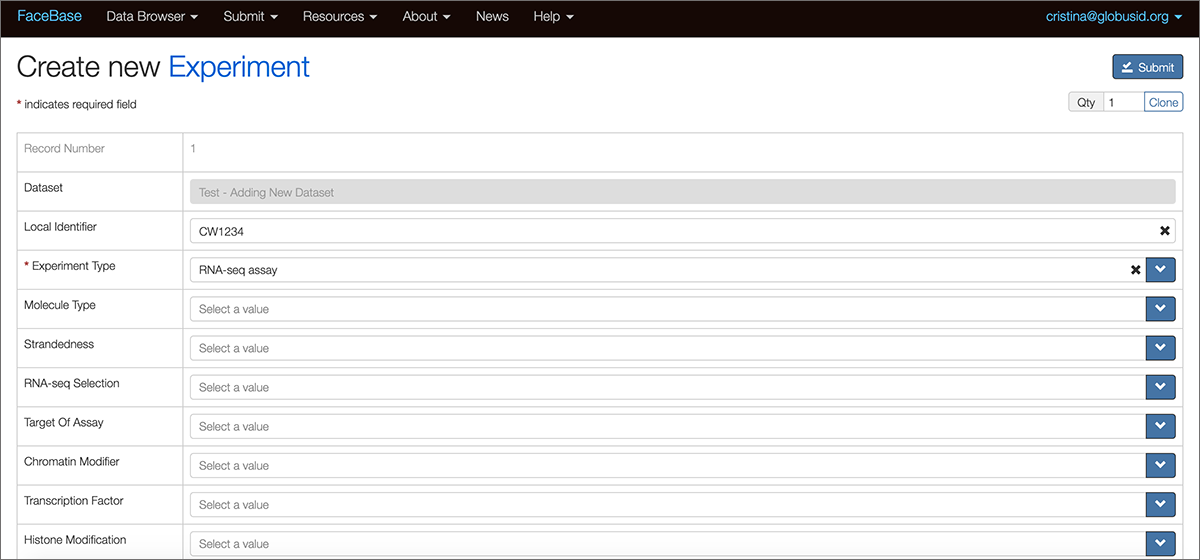
- Fill in the form as completely as possible for the fields relevant to your data. The example above shows a hypothetical RNA-seq experiment; many fields are left blank because they do not apply to that experiment type.
- Click Save. You will see the newly entered experiment information.
Link each biosample to its experiment
Now that your experiment records exist, go back and fill in the field you left blank in Step 1.
- From the Dataset page, go to the Biosample section.
-
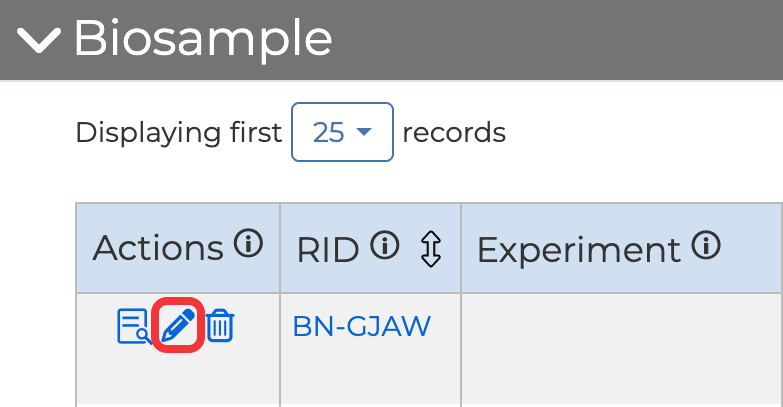
For each biosample, click the pencil (Edit) icon in the list — or open the biosample record and click Edit. The Experiment column will be empty until you complete this step.
-
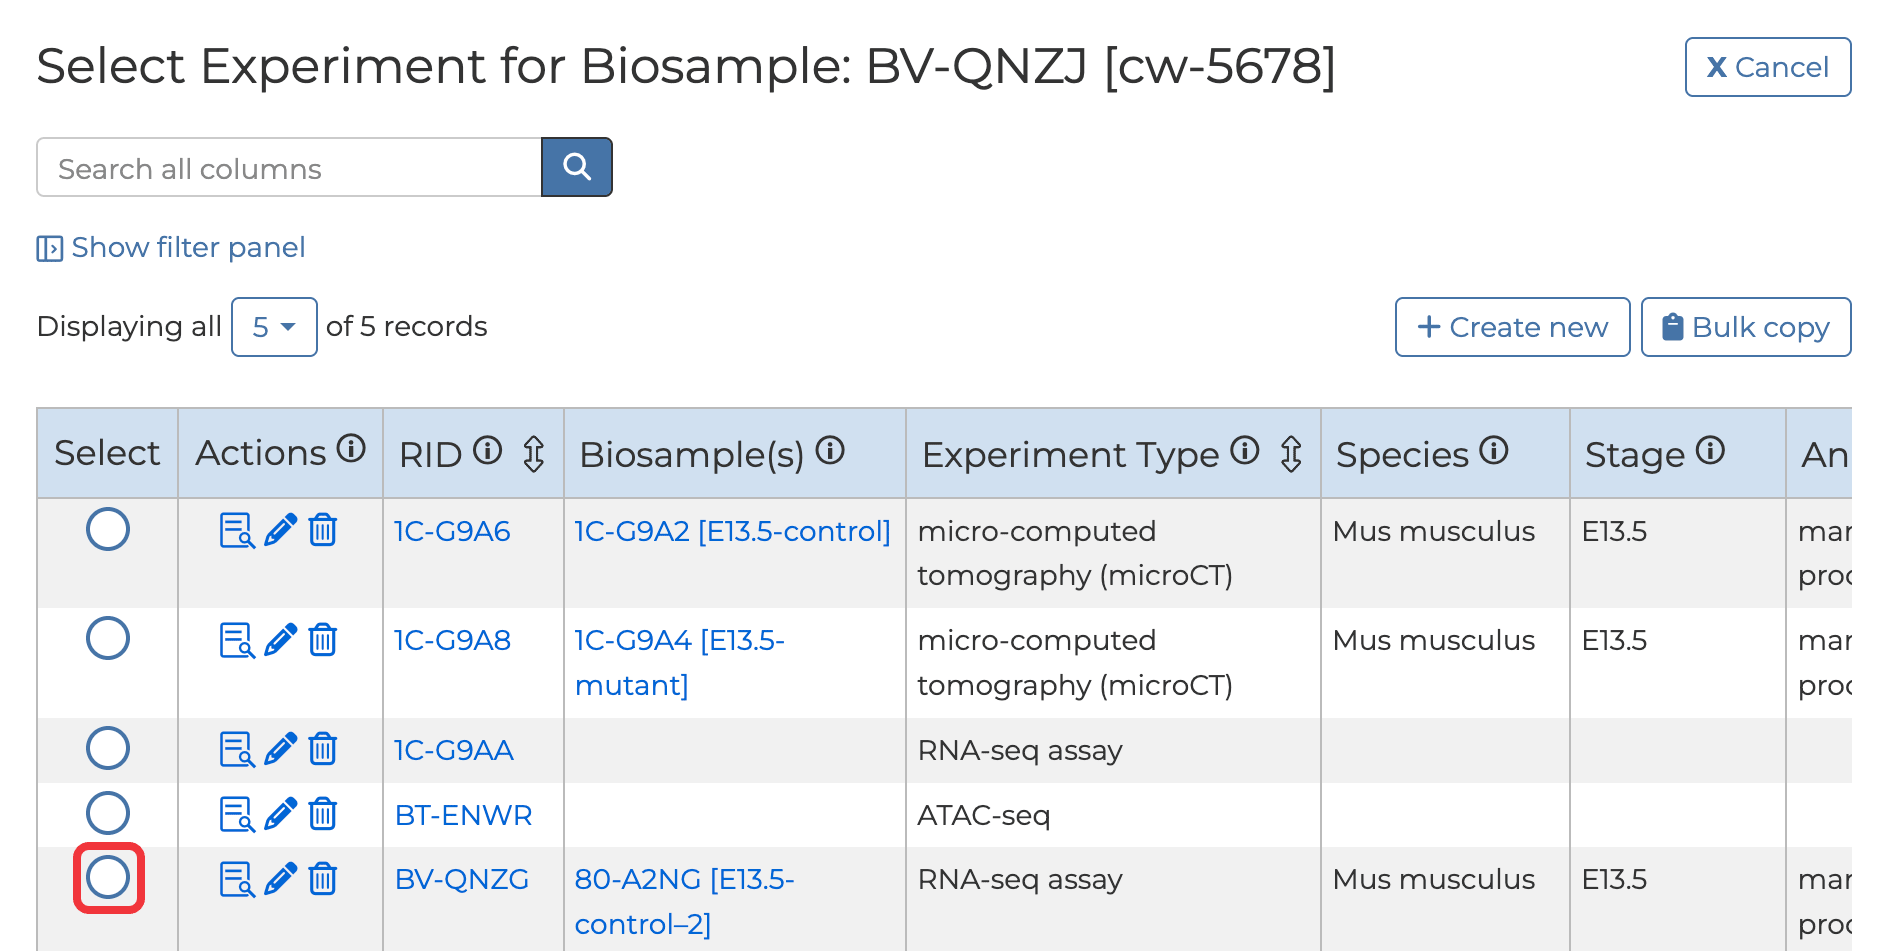
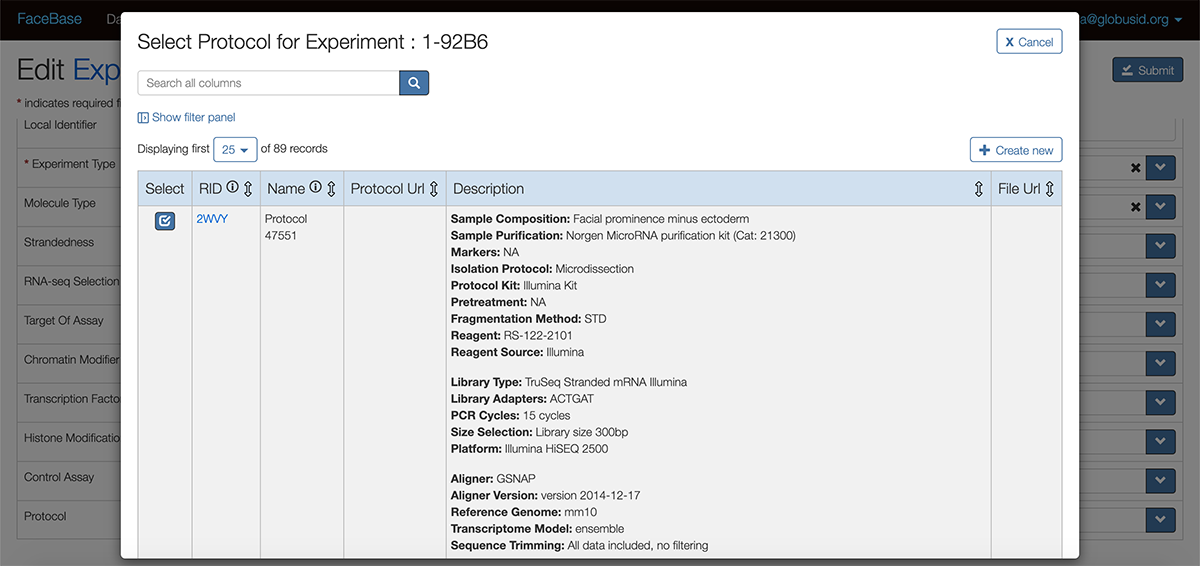
Click the “Experiment” field. In the “Select Experiment for Biosample” window, click the button in the “Select” column next to the correct experiment.
- Click Save.
Tip: If several biosamples belong to the same experiment, use Bulk edit to link them all at once.
Step 5. Link an experiment to a protocol
Linking a protocol tells others exactly how the experiment was performed, which is often what makes your data reusable.
- From the Dataset page, go to the Experiment section and click the View Details icon.
-
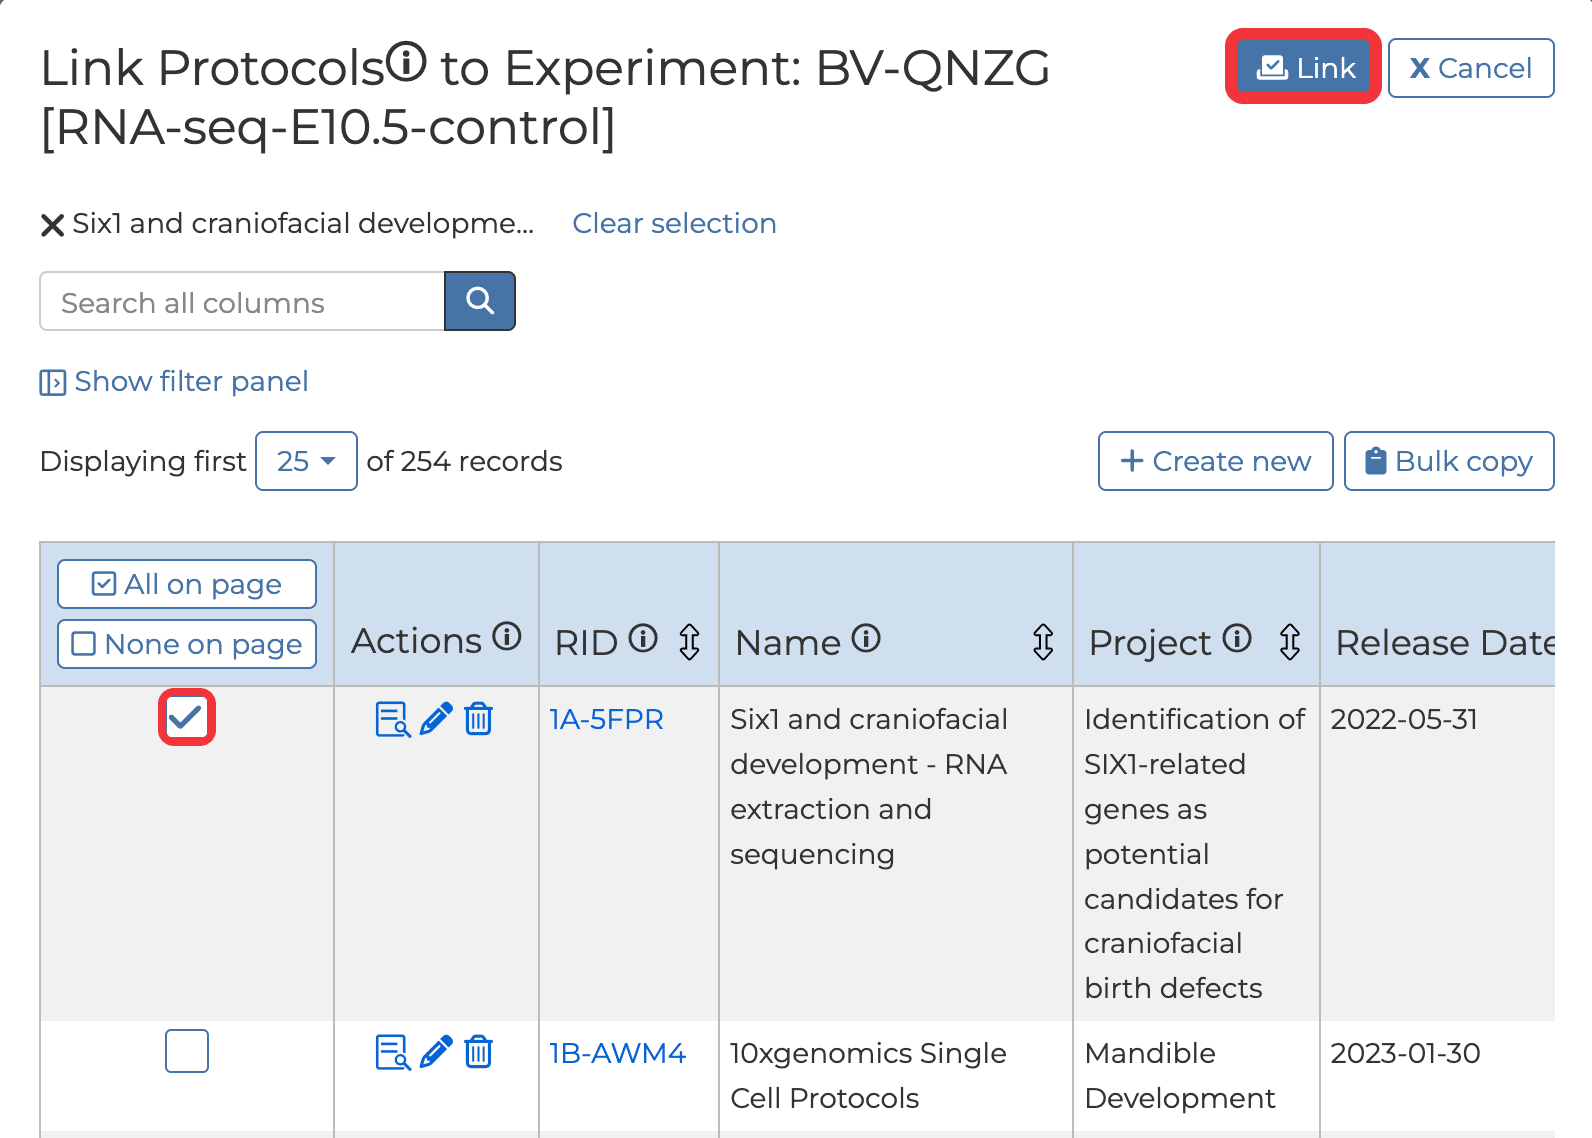
On the experiment record, find the “Protocols” field and click Link records. This opens the “Link Protocols to Experiment” window. If your protocol is already in the system, check the box next to it and click Link.
-
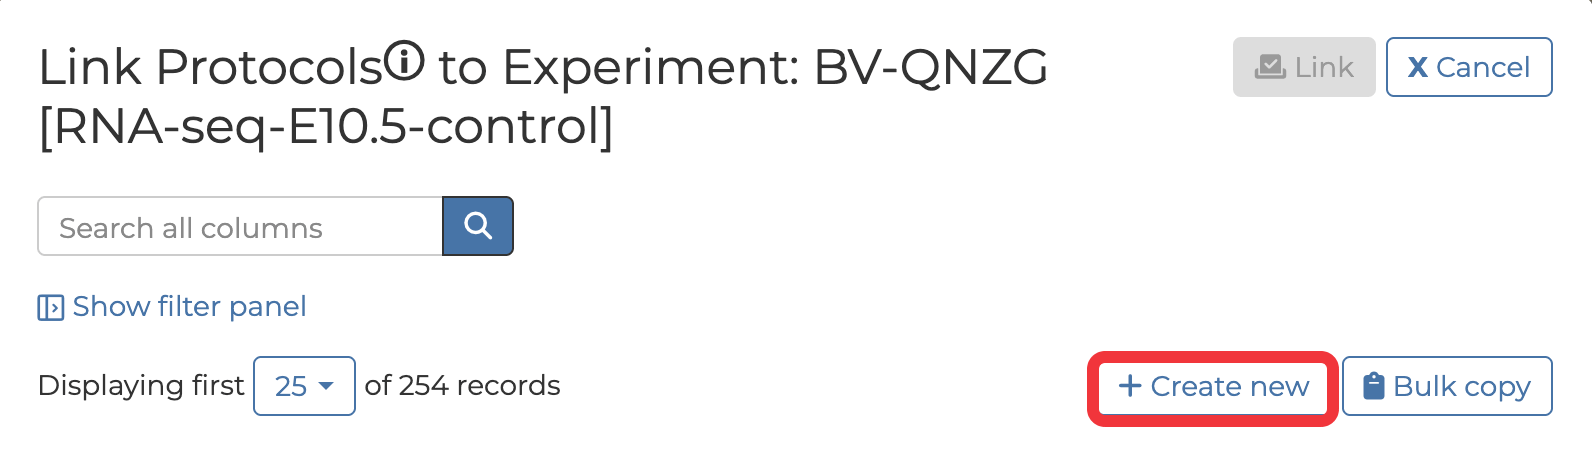
If your protocol isn’t in the system yet, click Create new. A new browser tab opens.
- Fill in the required Project and Name fields (leave the Released field set to “false”), then add the protocol in one of three ways:
- Fill in the “Description” field with the protocol information for online display,
- Enter a link to an existing online source in the “URL” field, or
- Upload a file (PDF, Word document, etc.) by clicking Select File at the “Protocol Document” field.
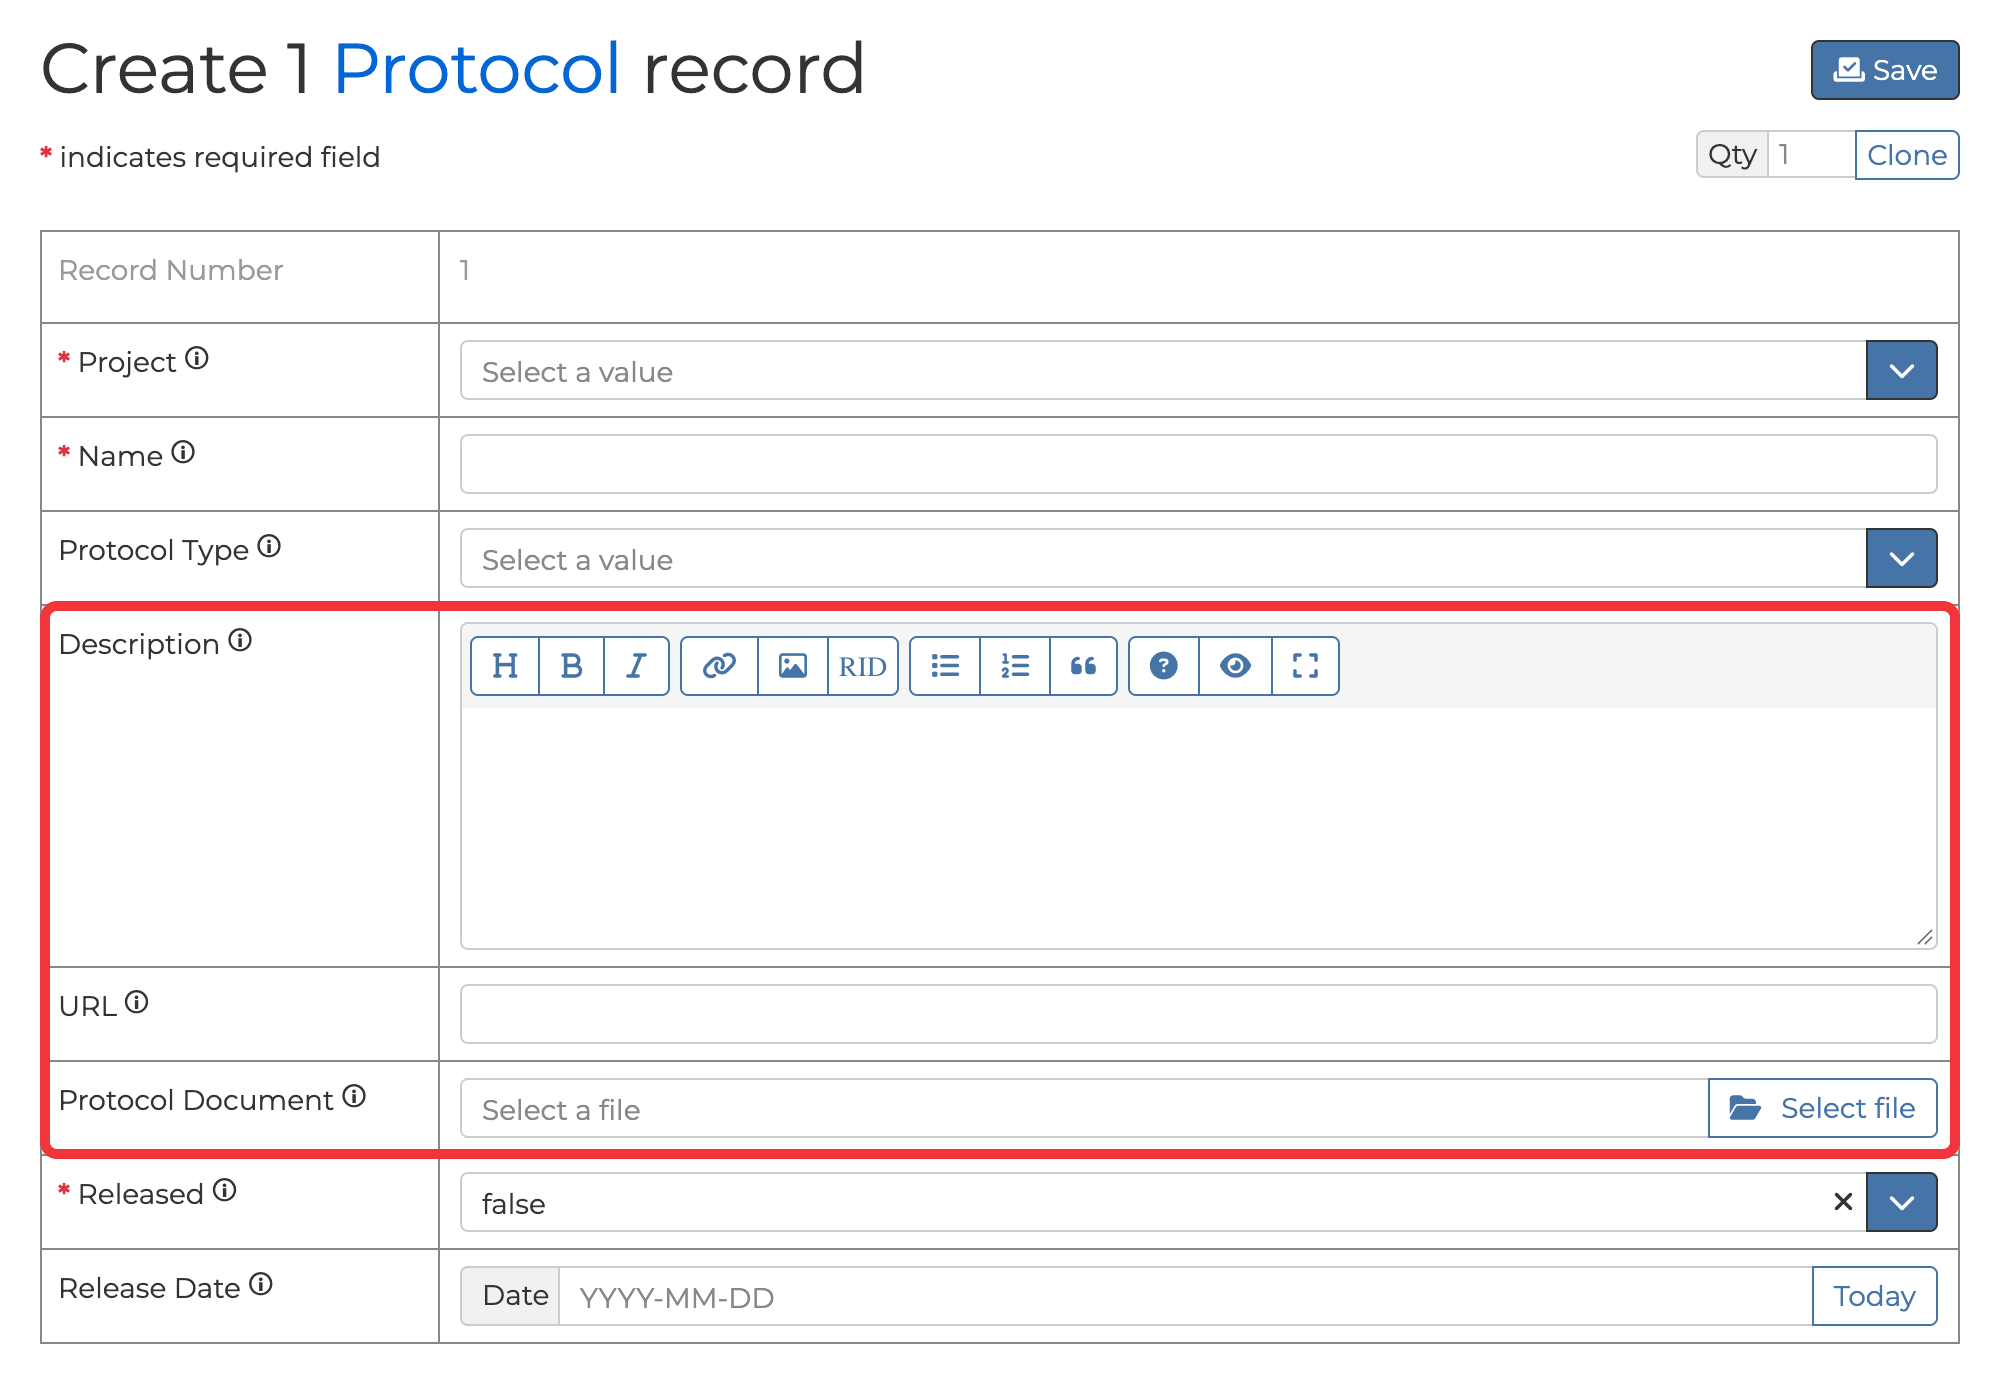
- Click Save. Close the tab and return to the “Link Protocols to Experiment” window to select the protocol record you just created.
Working with many records
Use Clone to create new records, and Bulk edit to change multiple records you’ve already saved.
Create several records at once with Clone
- From an existing record page, click the Copy button near the upper right. A new form opens with the same values as the record you copied.
- Click Clone to add another record to the form. Each click adds one record. To add several at once, enter a number in the Qty box before clicking Clone. For example, starting from one record, you can click Clone twice, or enter 2 in Qty and click Clone once. Either way, you end up with three records, as shown below. The form can hold up to 200 records at a time.
Tip: Each new form inherits the values of the right-most existing form. Use this to your advantage: fill in the fields that are shared across records first, click Clone as many times as you need, then fill in the values unique to each record.
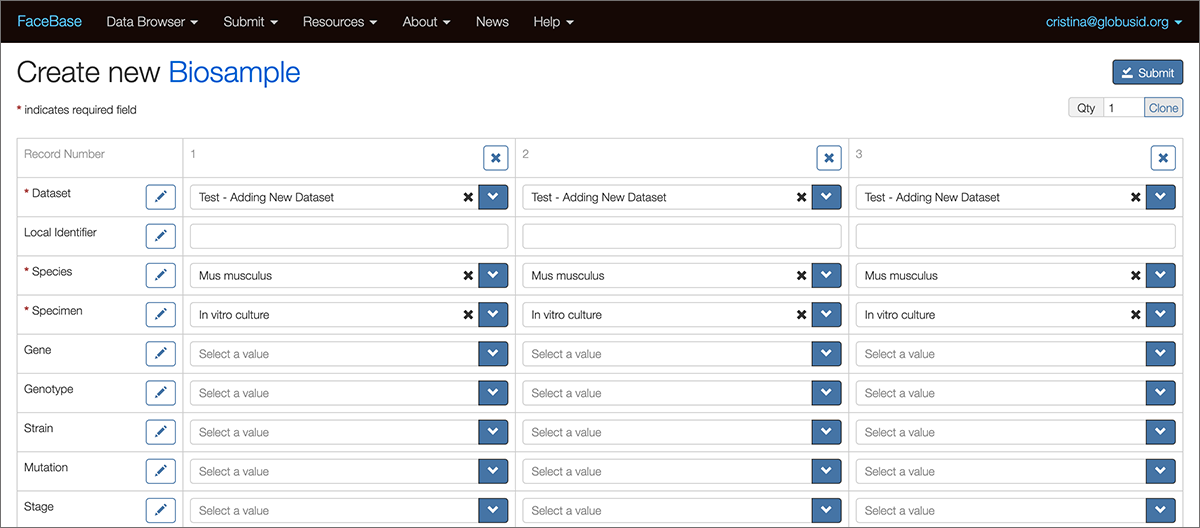
Click the image to see it full size.
Nothing is saved until you click Save. The entire form succeeds or fails as a single unit — there are no partial submissions.
Change a field across several records with Bulk edit
- Go to the section for the records you want to change and click Explore.
- Use the search box or filters to narrow the list to those records.
- Click Bulk edit.
- Find the field you want to change and click its pencil icon.
- Enter or select the new value.
- Above the field, select the N of N selected records checkbox to apply the value to every record in the list, then click Apply.
- Click Save.

Click the image to see it full size.
Enhancer reporter records
Enhancer reporter assays are entered directly on the Dataset record and do not use the five-step workflow above.
- From the Dataset record, go to the Enhancer Reporter Assay section and click Add records. A new window opens where you can select existing records in the system. To create a new record, go to the next step.
- Click Create new. A new browser tab opens with the data entry form.
- Fill in the details as completely as possible and click Save.
What happens next
When your biosamples, files, and experiments are entered and linked, review your dataset record for completeness and then email us to let us know it is ready for review.