Uploading Data Files
There are two ways to upload files:
- Interactive: upload files individually from your web browser (recommended for smaller datasets).
- Batch: upload files in a batch using command-line utilities or desktop applications (recommended for large volumes of data).
Before You Begin
You must first create a dataset and describe the experiments and biosamples used for that dataset. Once you have completed those steps you may upload data files.
Interactive File Upload
To upload files from your web browser, see instructions for file upload here.
Batch File Upload
Use DERIVA client tools for batch upload of files for a dataset.
Organize your files
The upload application will scan a directory of your choice and identify the files for upload. It will process them according to rules based on the subdirectories it finds them in. Please organize your files as follows:
facebase/<dataset-RID>/...
Where facebase is a directory containing a subdirectory named <dataset-RID> according to the Dataset’s Record ID (RID), e.g., 1-2345 found on your Dataset record page in the browser.
You may organize your files in any hierarchy under the dataset RID directory. Recall that if you use a local identifier in your Biosample records, we may be able to assist with automated linking of your files to your Biosample records.
Filename Conventions
The Deriva Upload utility will attempt to identify the file format of each file based on the filename extension. For example, TIFF images typically use either .tif or .tiff file extensions, and so on. To avoid ambiguity, we ask that you refrain from using the . character in the filename before the file extension. For example, currently the uploader would not support a file named mm_het5.e15.tiff because the file extension .e15.tiff or .tiff is ambiguous. It is okay to use . characters in the a subdirectory name, however, such as mm_het5.e15/image.tiff. Also, you may use the web browser interface to upload your files with any naming convention including . characters because the web browser form does not attempt to automatically infer the file format. We are working to resolve this current limitation.
When using Deriva Upload, it will attempt to match the filename extension with a known extension (see Data Types and File Formats). If the Deriva Upload encounters an unknown file extension, you will see an error such as this:
...
/path/to/facebase/1-2345/file.bad.extension.gz -- [RuntimeError] Metadata query did not return any results: /attribute/vocab:file_extension/extension=bad.extension.gz/vocab:file_format/file_format_id:=id?limit=1
...
If your filename complies with our Filename Conventions, i.e., you do not have any extraneous . characters in the filename itself, then please contact help to request support for a new file format. Otherwise, consider replacing the . characters such as renaming file.bad.extension.gz to file-bad-extension.gz for the example given. Deriva Upload does support multi-part extensions such as .nii.gz, .fastq.gz, .CEL.gz, etc.
Finally, ‘special characters’ in your filenames such as ;, #, spaces ' ', and $ will be encoded per Web standards. For more information, see Percent-encoding (Wikipedia).
Install the DERIVA client tools
See the Deriva Clients document for installation instructions. This installer includes both a graphical desktop application called DERIVA Upload and a command-line interface called deriva-upload-cli.
Configure the DERIVA Upload app
This section applies only to the DERIVA Upload desktop application.
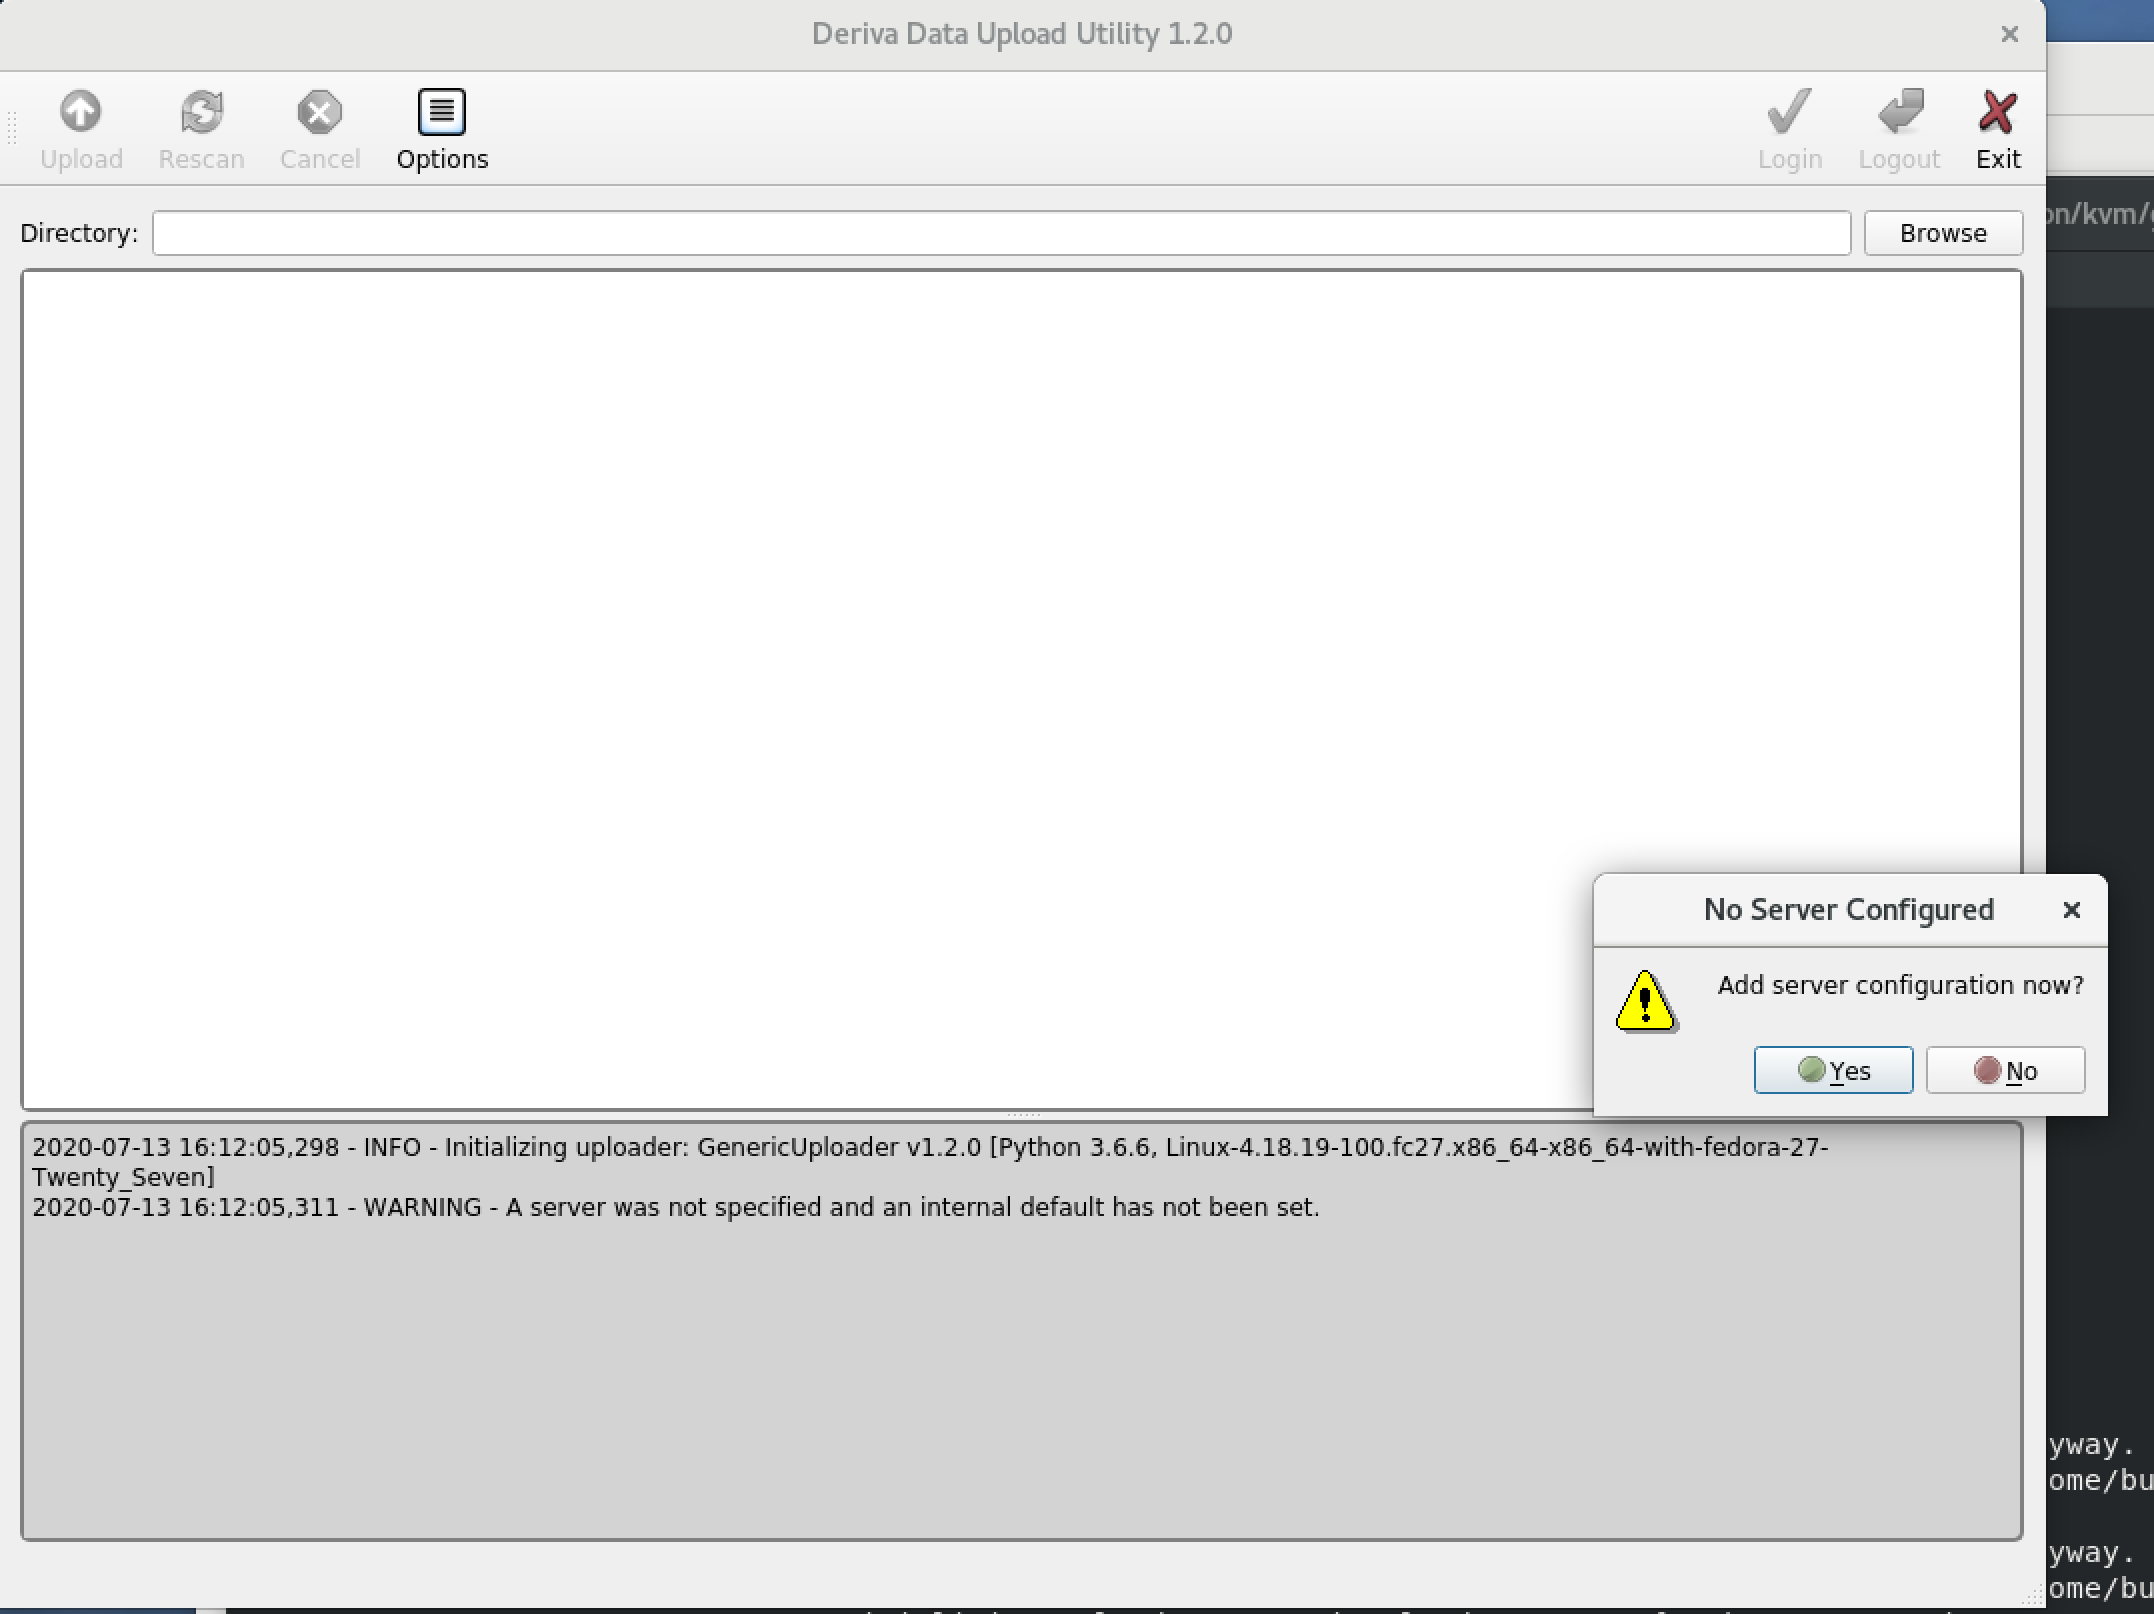
- Open the DERIVA-Upload application.
-
First time use: you will be asked to “Add server configuration now?” Click Yes.
-
In the Server Configuration dialog enter host
www.facebase.organd Catalog ID1. You may optionally add a DescriptionFaceBase. Click OK.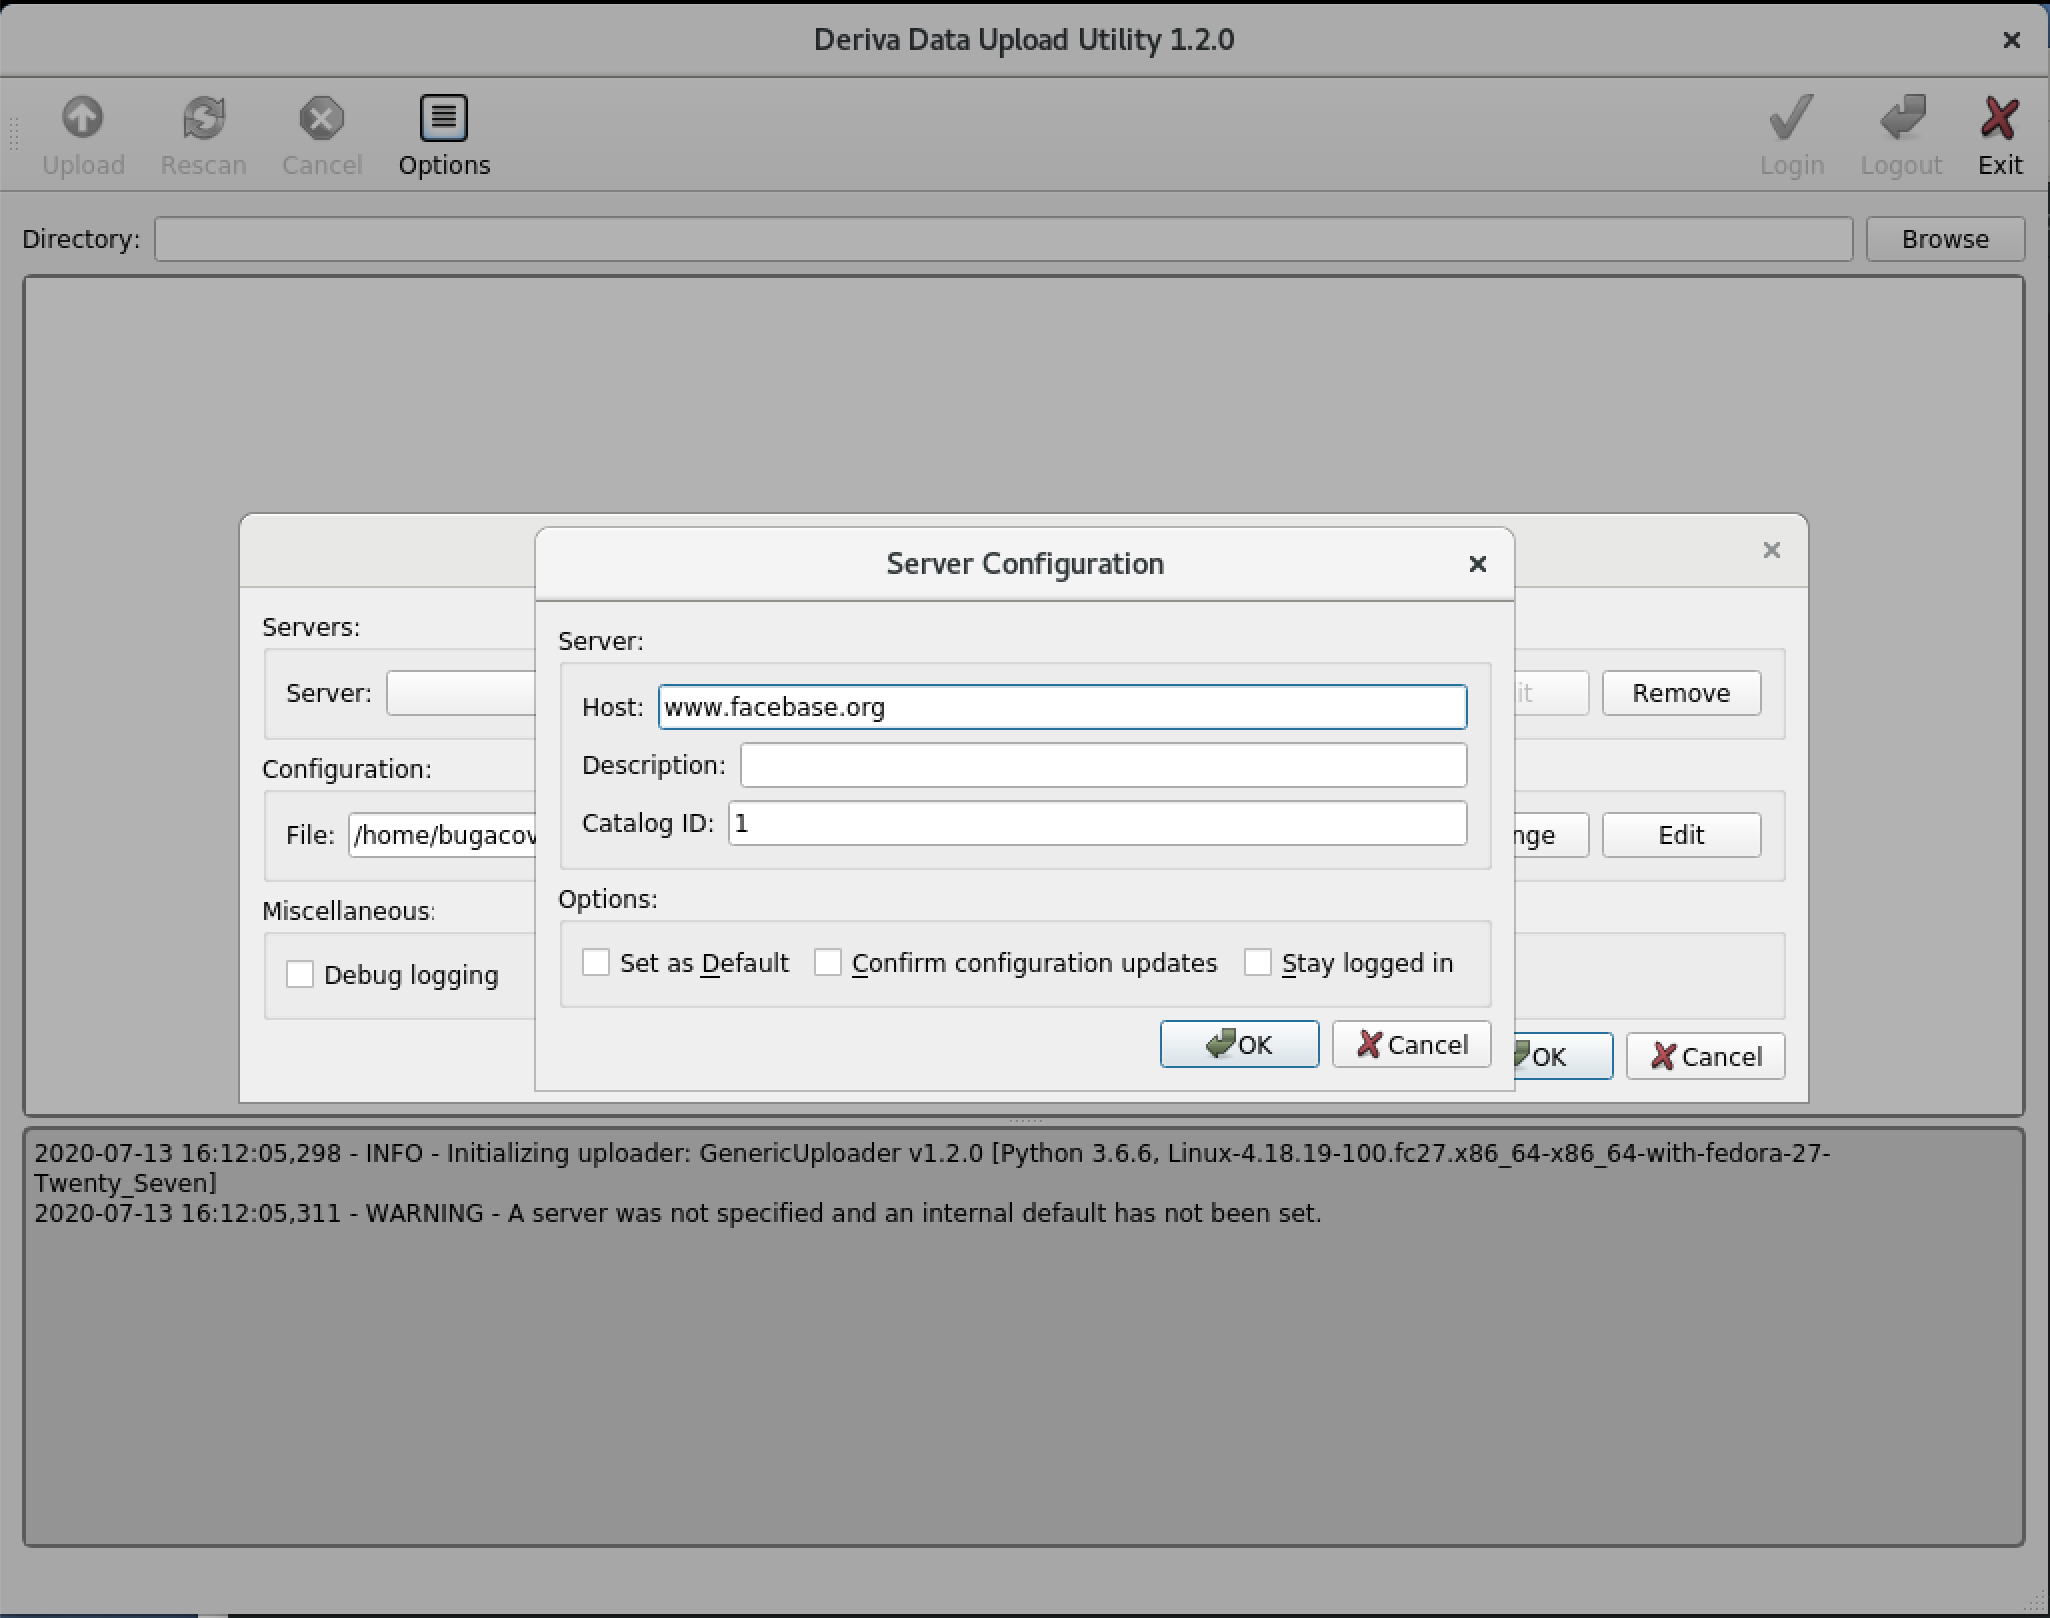
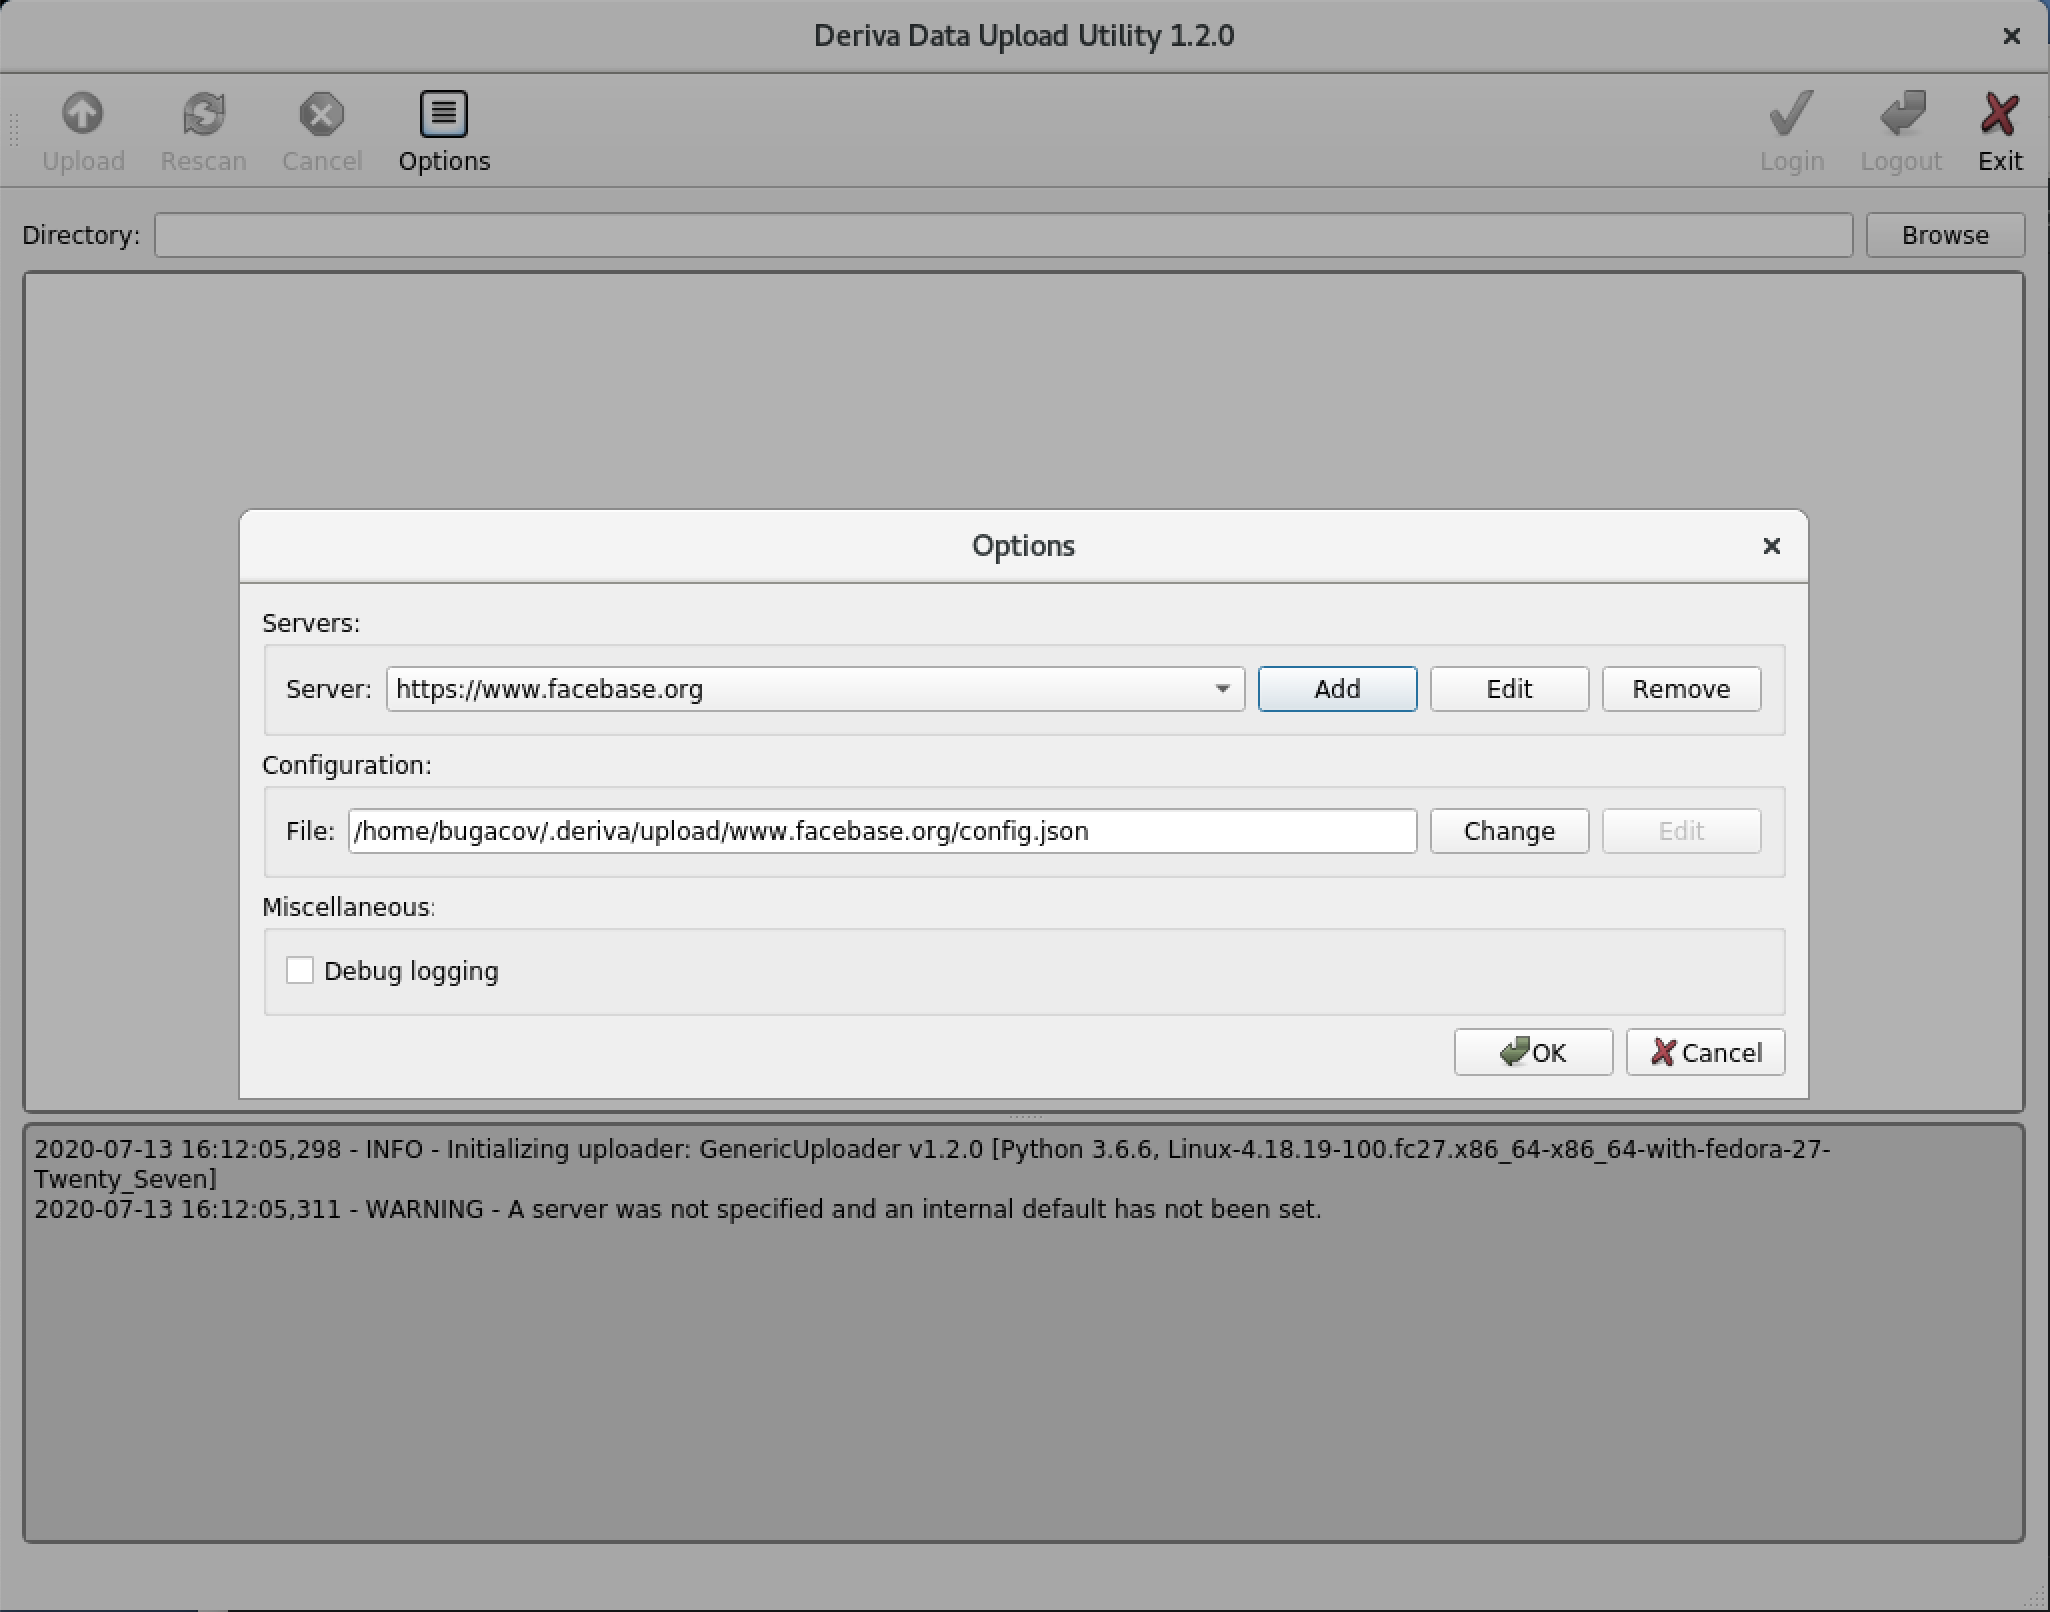
-
From the Options dialog click OK again.
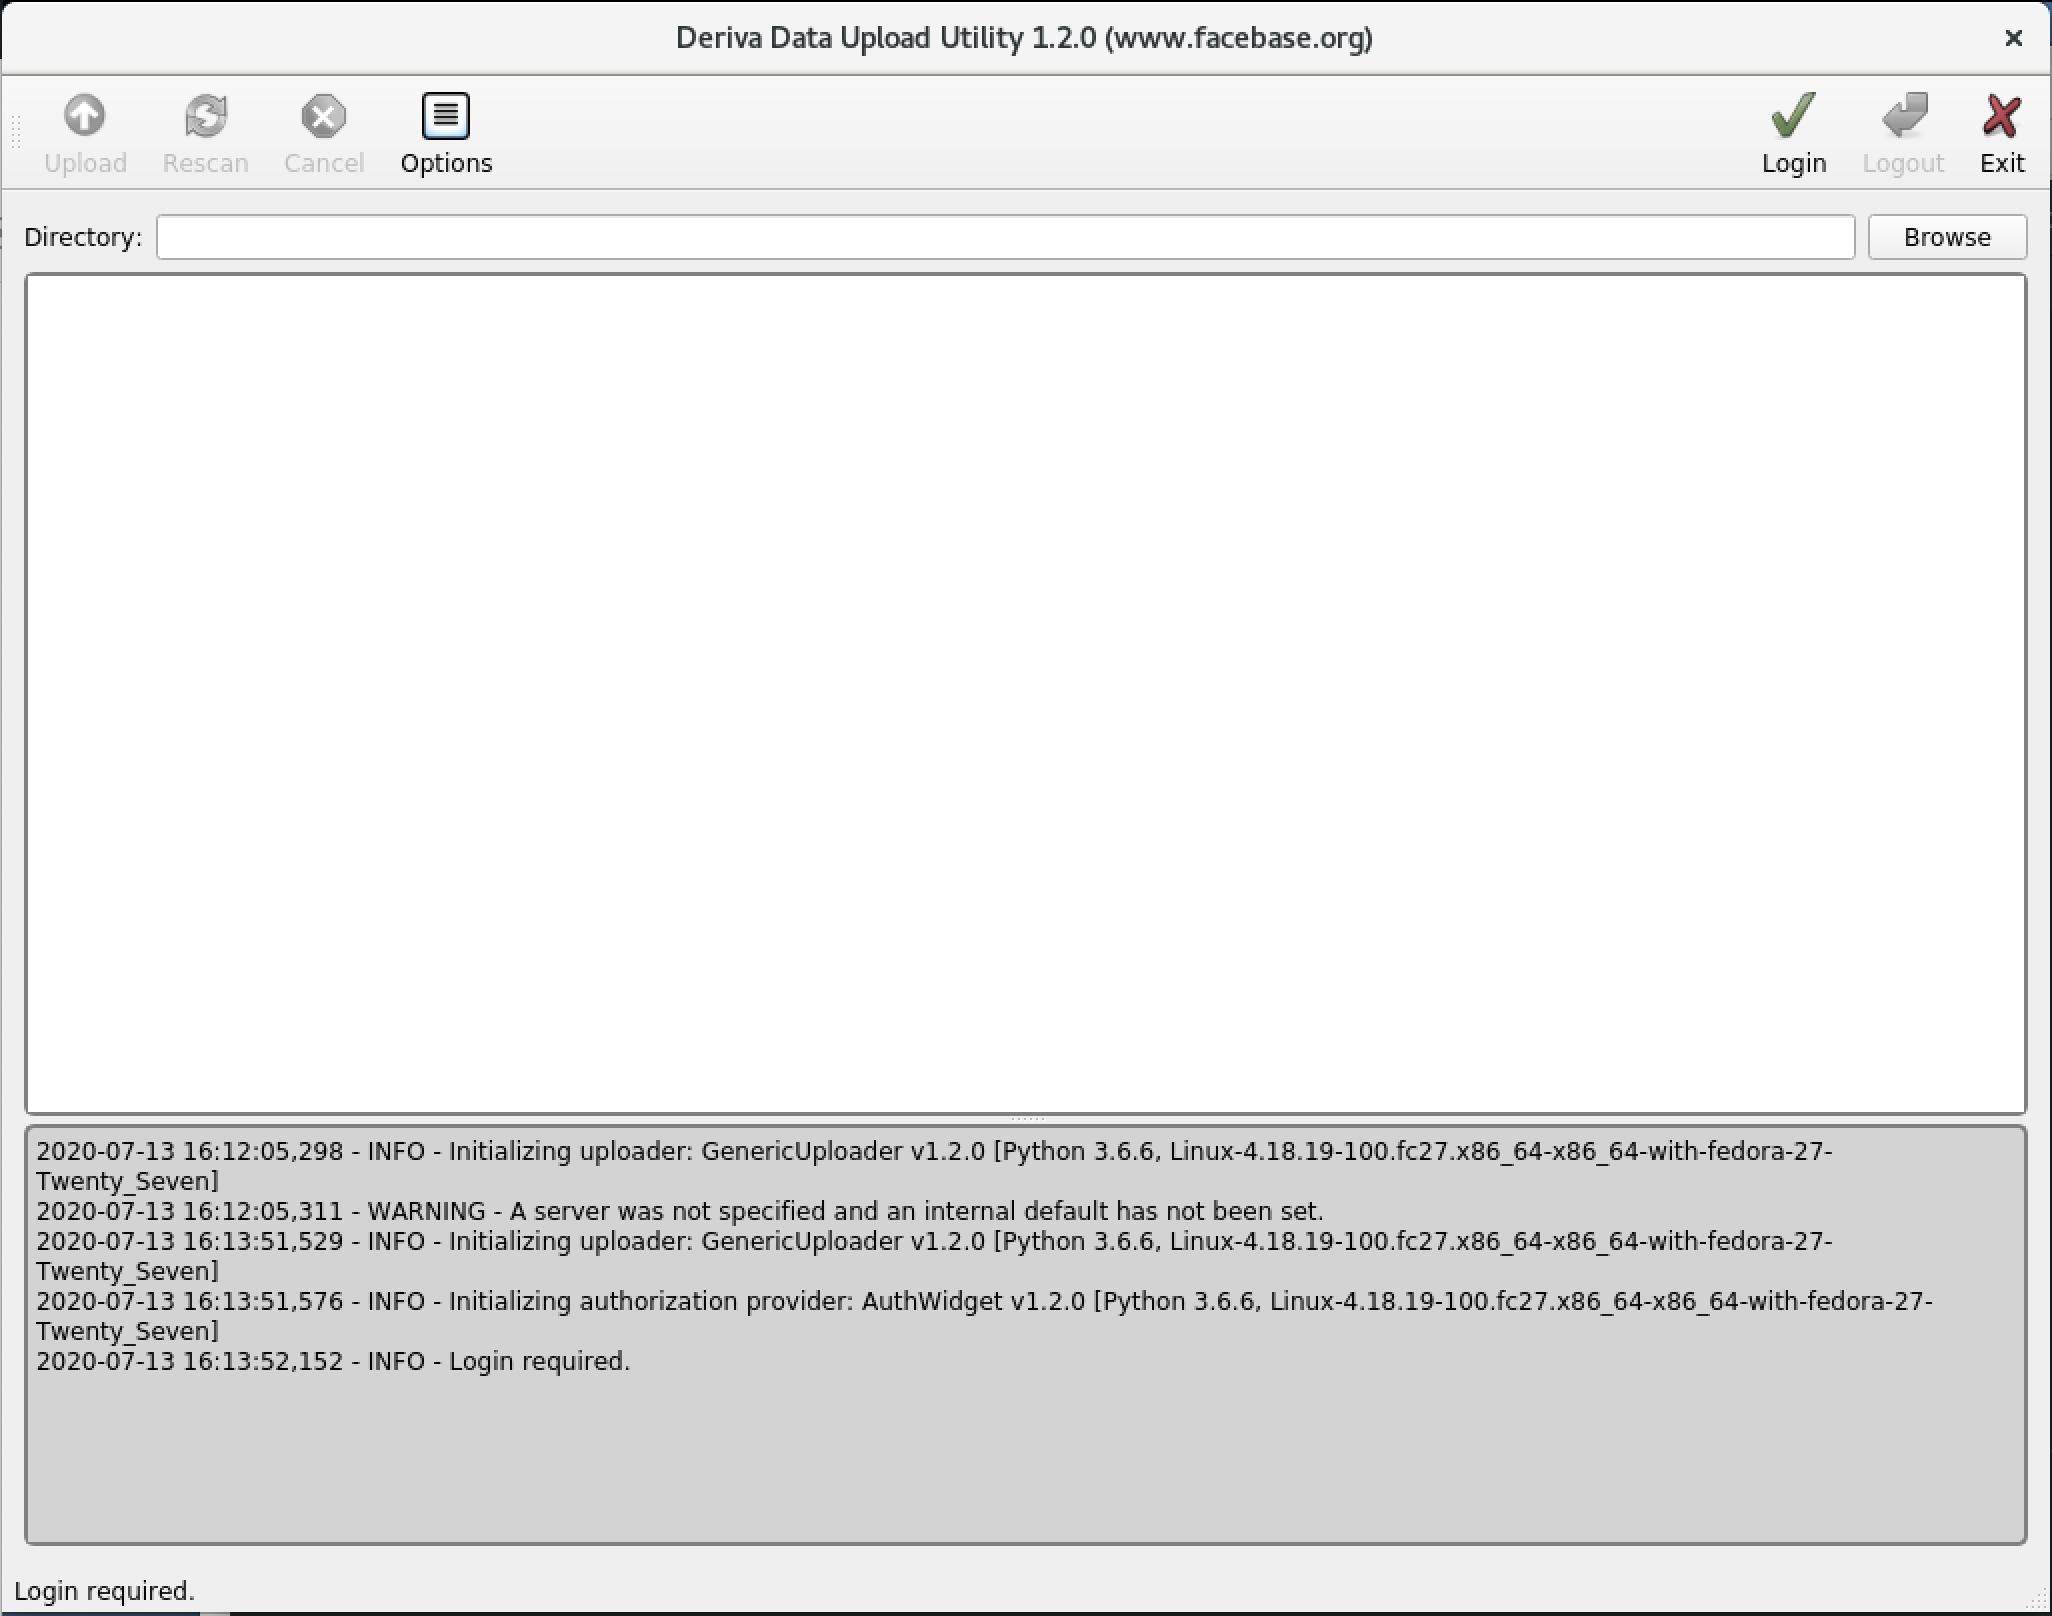
-
From the main window, click Login to begin your session.
Upload files DERIVA Upload

- Click Browse (upper right hand side)
- Find and select the directory with the data files you organized.
- Click Open.
- Confirm that your files are all accounted for in the “Pending” state.
- Click Upload (upper left hand side).
- Confirm that the status of all of your files are now in the “Completed” state.
If there are any errors, they should be reported in the status panel beneath the file listing panel.
Upload files with deriva-upload-cli
If you installed the DERIVA Clients you will find an application called “DERIVA Command Line Applications”. Running this application will open a terminal window with all DERIVA prerequisites and clients installed and ready to use.
- Establish an authentication token.
$ deriva-globus-auth-utils login --refresh --host www.facebase.org - Upload files for a dataset.
$ deriva-upload-cli www.facebase.org path/to/<dataset-RID>
Errors will be reported to the standard output or error. Please send email to help@facebase.org and
include any listed errors. Run the command with the --debug option to provide additional details. Use the
--help option for more information on command-line options.
Review the uploaded files
Return to the FaceBase site to your Dataset record. Scroll down to the File section. For each file, click the ‘edit’ icon (pencil), go to the Biosample field, click the drop down, find the Biosample associated with the file (e.g., the file is an image of a specific biological sample), select the Biosample, update or confirm the rest of the File attributes, and click Save.
Display of thumbnails
If you uploaded thumbnails, and you want those thumbnails to appear on the main page of your dataset, find the thumbnail record, edit it, and set the Show In Dataset attribute to “True”.
Display of surface models
If you uploaded 3D model mesh objects (.obj.gz) and you want to display a 3D model on the dataset page, follow the instructions for defining surface models.
Display of Genome Browser tracks
If you uploaded genome browser track data and you want to display your tracks on the dataset page:
- Go to your dataset.
- Find the Genome Browser subsection and click Add record.
- In the form, select the Mapping Assembly (required).
We highly recommend entering a chromosome name (chr1, etc.) and a start and end position. The browser will then display by default at that loci. The user will be able to change the browser position from the default position as they desire.